Showing posts with label Gardens. Show all posts

Monday, October 4, 2021

A Guiding Light

Mister and I celebrated our 25th Anniversary this year! In 1996 we spent our honeymoon on Nantucket and it was perfect. There is a beautiful little lighthouse on the island called Brant Point. It is iconic, quintessential New England. But lighthouses, while romantic and beautiful to look at on a beautiful summer day, are vitally important in the storm to mariners who are in dangerous, uncertain waters. 


Totally unrelated (but bear with me),  few years ago I had mister change out the light on our front porch for something more beachy looking. That old fixture became my inspiration piece. The metal was rusty and yucky but I tucked it away because it was telling me to! (Mister had wanted to throw it away!)

With a lot of time on our hands and not much to do during the pandemic we decided to build our own lighthouse as a homage to that memory. 

Planning it out took some conversation. We considered doing it out of wood. The cost of wood is prohibitive, the angles to be cut were mind boggling, and rotting would be a factor considering it was to sit in the garden. So, concrete seemed a reasonable option. 

Using an inverted tomato cage as our shape was part of our plan but that was going to be a LOT of concrete. We purchased a sonotube from Home Depot. Sonotubes are thick cardboard tubes that you fill with concrete to form columns or footings to build upon. We placed it in the center of the tomato cage and filled the space between the cage and the sonotube with concrete- leaving the center hollow. I TOOK NO PICTURES OF THIS! I get caught up in the project-sorry. 


This project took about 10 bags of quick setting concrete. We mixed one bag at a time and packed it into place. Use thick gloves or this stuff will destroy your manicure! Because this is quick setting product time is important. You cannot stop, take a call, or go to pick up the kids in between. 


Once everything was packed well another bag was mixed a little soup-ier (loose). Mister used this as a smoothing coat over everything.

The metal prongs that would normally be pushed into the ground on the tomato cage were still sticking up past that first circular ring. He cut them off with wire snips. Level out the top where your base and light fixture will sit.

I attempted to make a concrete disk to sit on the top using a plant tray, the kind that catches water under a potted plant. Without rebar it broke apart. 

Plan B. We purchased two round, wood disks at Home Depot, a can of black spray paint and solar lights (we bought 2; one for backup) used to light up walkways, doweling, small eye hooks and black chain all for less than $35, I think.

Mister glued and screwed the two wood discs together. He then drilled holes around the outer edge to accept doweling. I cut the dowels to length, glued and inserted them into the holes. After the glue dried, eye hooks were screwed into the tops of each dowel.  


We had some pvc board and mister cut and mitered pieces into a hexagonal shape to elevate our light fixture as it just sat too low and looked wimpy. That was screwed into the round discs. We did cut a large hole  through the center of the wood discs to allow water to pass.

Very little sanding happened (because that was my job)


I painted it black. When that dried we added the chain through the eye hooks.  The base got a few coats of exterior white paint.


A little deconstruction of the original light fixture, a little black spray paint and the insertion of our deconstructed solar light and we have a mighty fine (or at least functional) lighting mechanism. 

Mister used silicon to attach the disc to the top of the concrete structure. Also, lesson learned during a storm, that a dab of silicon to secure the solar light was necessary. Good thing we bought 2! 


On hot nights we sat on our porch watching the light from the summer sun retreat. Just as the last bit of sun goes out the lighthouse shines bright!  25 years of marriage... wow. 

In all the craziness of the past 2 years I am most thankful that when 
I am with my husband I am in a safe harbor. 

God has blessed us both in this marriage.

 And, though these times are dangerous and uncertain He has been our guiding light. 

t


Sunday, August 2, 2020

How To Add Living Space For Less Than $1 A Square Foot

** Boy, math was never my thing. The truth is this was less than $.55 per square foot! 

Everyone who has ever built anything or bought property knows that it is impossible to add square footage to your living space for less than two dollars per square foot...

 until now!

15 years ago, or so we had built a deck kinda in the shape of a baseball field (at least in my mind). It's just pressure treated 2x4's sitting on stones and bricks around the perimeter and then filled in with pressure treated 2x4's for the decking. It has been pressure washed multiple times and painted with the special paint that is supposed to hold up to outdoor weather... not so much.  It's okay, but does need to be painted again. In all fairness, it was done 5 years ago, in this post.


We purchased an offset umbrella and it nicely covers the patio table and chairs. It tilts so we can catch the sun/guard against it regardless of where it is positioned in the sky. I love spending mornings and evenings out there. It's nice but it's just the back deck.

Much more time than usual has been spent out there these past several months as is probably the case in many of your homes and yards. Usually, we are running off here and there to enjoy all that summer has to offer in New England but this year it is different; places are very limited in time and amount of guests, some places didn't make it and won't reopen at all. Some places we can't travel to without quarantining ourselves when we get there and when we come home.

That got me to thinking, "What exactly is it that I am missing about those places?" Places we like to visit usually are in close proximity to the ocean... Well, okay, I can't do anything about that but there is usually live music, good food and a little atmosphere... Hmmm...

This one took no time to sell to Mister on. If you ask him he would say it was all his idea to begin with. I quickly placed an order on Amazon.

The next day we were off to the Home Depot! We purchased 4 flanges and 4 plumbing pipes that are approximately 10 feet long and we headed back home.


Mister pounded the pipes into the ground with a rubber mallet until only 8 feet was sticking up. We used a level to do our best at keeping them from leaning one way or the other. This photo shows that either we were way off or I take photos at the wrong angles.


Mister then threaded the flanges on to the tops of the poles. The flanges got a coat of black spray paint so they won't rust. (Believe me they will. We had to go back and do this step after the first rain!)


We scrounged around to find some S hooks we had used for another project and attached one to each pole. Mister put some caulking at the top to cover the hole down into the pole. And right about then my package from Amazon showed up. Perfect timing!

Inside the package was led string lights. We strung the lights along the poles with a little draping and secured the ends with zip-ties.


Now we could rest from our day's labor. (It truly took about 2 hours, including the trip to Home Depot). Mister cooked us some dinner on the grill and we ate as listening to music and watching the sun go down.


As the daylight waned our music got a little louder. With a glass of wine in hand we witnessed true magic. Those little globe lights, without any provocation, whisked us away from all the scary news of this world and we just sat there, in our new room, at the back of our house! We danced to Ed Sheeran as fireflies twinkled in approval just beyond our "walls".


Now, for those who want to know how I got my figure of $2 per square foot: 

4 flanges-$31.88, 4 poles - $57.24, globe lights-$43.99,tax- $8.24 for a total of $141.35 to gain a 16'x16' room=$.55 per square foot. We had the spray paint, the s-hooks and caulking from other projects. 

No, we can't use it in the winter and yes, we do have mosquitoes in New England but right now, in these strange times, to us this new room is priceless. These little lights changed my anxious, worried and scared perspective and they brought to mind the changes light can bring.  

The light shines in the darkness, and the darkness has not overcome it.
John 1:5

God is lightand in him is no darkness at all. If we say we have fellowship with him while we walk in darknesswe lie and do not practice the truth.  But if we walk in the lightas 
he is in the lightwe have fellowship with one anotherand the blood of Jesus his Son 
cleanses us from all sin. If we say we have no sinwe deceive ourselvesand the truth is not in us. If we confess our sinshe is faithful and just to forgive us our sins and to cleanse us from all unrighteousness. 
1 John 1:5-9

Thanks for spending time with me today. 
Praying you are finding ways to bring peace into your own lives. 
Jolena

** originally this post was titled How To Add Living Space For Less Than $2 A Square Foot due to my reversing my numbers when doing the math. 

Linking up to parties on these blogs:

Monday, April 20, 2020

Garden Arbor Tutorial

At the onset of the CoVid19 lock down I knew I was in for some very rough days. My days were about to be invaded - full time. My family is going to be with me pretty much 24/7 and while I am a very sociable person the thought was totally overwhelming. All the projects that I always said I didn't have time for.... well, I wouldn't have that excuse anymore! Mostly, I was anxious for my husband who DOES NOT know how to be still. I knew he would be looking at project after project with expectations and a pace that I just couldn't and didn't want to keep up with. I've moved past that but in the beginning I needed to have something for him to do.

Fortunately, I had a few projects in mind that I had wanted to get done and I thought this one could occupy him for a few days.

After the garage was built we put in walkway from the driveway to the backyard using pavers and white stones. A year of so living with that taught us it was a bad idea. the stones never stayed put. We liked the cement pavers because they went with the what we used for the bbq shack in the back so we kept them and put down weed barrier and mulch with some dirt in  between. I made a concoction of buttermilk, moss and water and spread it in the cracks. (I will let you know if that works.) It has yet to grow.

And we built the arbor that spans the distance between the house and the garage. Here is how we did it:

1 bag of quick set cement
2 4x6x12' pressure treated posts
2 2x8x12' pressure treated pine
2 2x4x8' pressure treated pine cut to 2' lengths
Galvanized screws
Wood glue

Mister used a post hole digger to dig two holes for the 4x6x12 posts about 2 feet deep.


We bought 12' lengths knowing that we would be cutting some off the top once they were cemented in place. Using a level make sure they are plumb-straight, from two sides. Add the quick set and check your plumb, again. Add water. At this point we secured a strapping across the top to keep the posts in place, level/plumb.


We waited about 24 hours for the posts to set in the cement.

While we waited on those to set we got busy on the top, working in our garage. We measured the distance between the posts adding a few inches beyond each to really fill the span between the garage and house. I want a little detail on the outsides of the post.  I drew a simple design on a piece of card stock for our template for the crossbars and Mister cut them with a jigsaw out of the 2x8x12s. Nothing fancy here. This detail will sit beyond the posts on each side.


Next, we set up some sawhorses and placed our two top rails on them with a piece of scrap wood to space for the where the posts will be.


Now for the cross arms that will sit at the very top. (Not really sure what else to call them.) For these we cut the 2x4x8s into 2 foot lengths and later mitered each end. I measured making sure to keep an odd number of pieces (more appealing to the eye.) I landed on seven pieces. I marked the top of the crossbars for easy placement.


Mister wanted them to sit into the cross bars so he put them through several passes on the table saw making "teeth" that are easily removed with a hammer. (That was my job.)


Once they were cleaned up they sat down, hugging onto the crossbars.


Ready? Let's put this together!

Back outside! We removed the strapping the helped keep our posts plumb. We held up a crossbar at a height that seemed reasonable to us. The bottom of the crossbar is a little over 7 feet high. I wanted it to feel like you were walking into a separate "room" when you came through. The roof line of the house was factored in as well as the trim around the window. It all had to work together. If it went too high nobody would really notice it.

If you have extra hands you can just hold the crossbar or you can temporarily attach to posts. Make sure it is level, but sometimes level doesn't look right and slightly off makes more sense to the eye. Take your time, step back and look at it. Mark your posts where the top (you will notice in the picture that someone started cutting at the bottom) of where crossbars will sit. Remove your crossbar and cut off the excess post. Mister used a circular saw and it took two cuts, one on the front and one on the back to get through.


Attach the front crossbar, screwing and countersinking the screws from the back of the post into the crossbar. Attach the second crossbar onto the back of the posts, I didn't care if the screws show here. We used that previous piece of strapping to help us get both crossbars up and level with each other.


When the crossbars were mounted, one on the front of the posts and one on the back, you can start to place the small arbor arms. Mister lined up the arms with the marks I had made earlier and attached them from the top with galvanized screws.


*The "oops" cut got filled in with wood glue and a strategically placed screw allowed it to dry well and maintain integrity.


The arbor will get a few coats of white opaque stain when the wood has dried out enough. For now this is as far as it has gotten. I will update this post when the stain goes on.

So, what do you think? A good use of time? Here is the breakdown:

Time: 2 days
Skill level: Beginner, if you keep your cuts simple
Cost: $100
Worth: Priceless, as it kept Mister busy and is a great addition to the property.

**UPDATE
A couple coats of opaque white stain and some temporary pot fillers were added. Also, my attempt to grow moss with the buttermilk mixture did not take. I ended up transplanting some from another area in my yard.


Linking parties: Our Home Away From Home, The Dedicated House, Blue Sky At Home, My Uncommon Slice of Suburbia, Create With Joy, Lou Lou Girls, Grammy's Grid, Anything Goes, My Little Shop of Treasures, Across The Boulevard, April J Harris, Dabbling and Decorating, Ducks N A Row, Ginger Snap Crafts, Life Beyond The Kitchen, Katherine's Corner, The Pin Junkie, Shabby Art Boutique, The Answer Is Chocolate, Chic On A Shoestring, Coastal Bohemian, Create With Joy, Imparting Grace, The Cottage Market, Pieced Pastimes, Our Hopeful Home, Finding Silver Pennies

Tuesday, September 10, 2019

Pro.found Fall Home Decor

I love Summer.


I grumble as the calendar turns to September and I go kicking and screaming like a two year old being dragged away from the beach.  But... this year is a little different. I cannot say why for certain. I did get more than my fair share of days at the beach this year so maybe that makes it a bit easier. It does seem that Labor Day weekend brought about the end or summer as the temperatures turned immediately cooler here in New England- like 20 degrees cooler during the day. Was there a switch that was flipped? The nights turned instantly cooler and lend to open windows and a covering of sheets and a blanket. Can I smell pumpkin spice in the air?


As summer comes to a close the thoughts turn to all things home. And, surprising to me, I'm ready to decorate for Autumn! I'm trying not to go crazy. Mister took me the Brimfield Antique Show last weekend but I left empty-handed! Mister picked out some things but not me.  I was looking for a couple items in particular but didn't find exactly what I was looking for. In the back of my overwhelmed brain (if you've ever been to Brimfield you can't help but be overwhelmed) I knew my heart was waiting for something better.

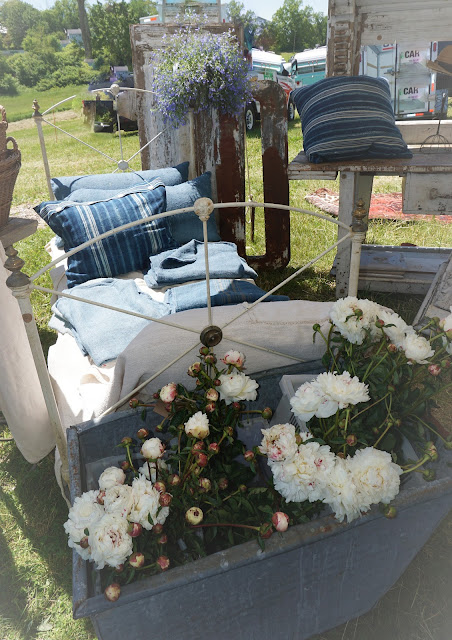
The weekend of September 21-22 some of the sweetest ladies will be putting on the next Pro.found Vintage Market. I've shared our trips to this market before here and here. I went to the market in late Spring this year and brought home some treasures for our yard. Here are some of things that caught my eye while shopping.


Mister brought home these two pieces for the yard.

                                                                       The compass rose.

                                                                  The Eat Here sign.

But it is Fall (even though the calendar doesn't yet agree) and I am ready to embrace it as I prepare to shop for some fall decor. If you're local come out to the Pro.found Vintage Market in Central Massachusetts! Put on your sweater and boots, grab a spiced cider donut and a cup of apple cider and enjoy the vibe these creative women have put together. I know I'll be there...

If you can't make it out many of the vendors have online shops! You can find links to them on Pro.found's vendor pages or check out their facebook pages.


**This is not a compensated/sponsored post. Opinions are my own. Photos are my own. I just love going there and supporting the talented people in my corner of the world.

Linking up to these parties:
Wonderful Wednesday Blog Hop, Ducks N' A Row, Katherine's  Corner, Imparting Grace , Our Hopeful Home, Knick of Time, Life With Lorelai, Shabby Art Boutique, Our Home Away From Home