Friday, February 10, 2017

Decorative Wall Crown Tutorial


I need a crown! No, that is not an ploy to make sure my family know I should to be treated like a queen (ha!) and no, there was no costume party... not that type of crown. I was looking for the type of crown that hangs on the wall and usually has some kind of fabric hanging down from it. I found pictures on line....

like this on Pinterest...

Valicity Decorative Wall Teester Bed Crown:


and this, also on Pinterest...

French country antique Louis Philippe bed with contempary French fabrics and antique French Louis XVI mirror:

....but I didn't want to spend a lot of money. How can I make it for less? Here is what I came up with.

Materials

Foam core board
Metal decorated edge trim or flat lace 1.5" tall
Lace 4" tall
1"x1.5" piece of wood-36" long. (I think I bought it at A.C.Moore's by the doweling)
Tacky glue
Plastic wrap
Gold spray paint (or any color you want)
Small 'L' brackets-2

First I guessed at about how big I wanted my crown using a tape measure bent into a semi-circle. Also I was trying to use what I had on hand! I cut a piece of  foam core board 20" long by 4" wide using a metal ruler and an Exacto knife. Tip: make several passes at it, do not try to cut all the way through the first time and put something underneath to protect your floor, table, ect.

My 20" x 4" piece of foam core wouldn't bend enough and I did not want to break it. This is where my obsession with home improvement shows pays off a bit. On one side I measured out and marked approximately 1" intervals; about 19 marks. At the first mark, with my Exacto knife, I cut across the board, cutting about 1/2 way through the foam. (Be careful not to cut all the way through.) Just a hair next to that first cut I made another cut parallel to it but at a slight angle into the first cut. I used the tip of the knife to dig out some of the foam to form a channel. I repeated that procedure another 18 times or so until the 20" long foam core board has about 19 very thin channels cut into it. This will be the inside of the crown. Now your board will bend nicely but still have good structure.


I wanted my crown to have points. I purchased a 4" deep piece of lace with pointy things to go at the top of my crown. Laying my board flat I measured a piece of lace to match. My lace has tall points that would have made me cut into one of the points making it uneven. I chose to shorten my board a smidge to fit the lace pattern. Pull out a cookie sheet or cutting board and cover it with plastic wrap. Pour some Tacky glue into a bowl and put your lace into it. Using your fingers really try to work the glue into the lace. This takes some effort, don't skimp.  When it is sufficiently saturated lay the lace out flat on the plastic wrap. I wanted my lace to fan out at the top so I rolled up a piece of tin foil and scooted it up under the plastic wrap to push up the top edge of the lace. Leave it to dry. Depending on the weather this can take a couple days.


There is a "lace" at the bottom of the crown. On my crown I used a piece of metal trim that I had laying around from a project from several years ago.


If you do not have this or cannot find it, don't worry, just use another piece of lace. This lace should be about 1.5" wide. Cut it about 1" longer than your board. Follow the same steps you just did for the top lace. Lay it flat on the plastic wrapped cutting board to dry.


Once your lace is completely dry pull it off the plastic. The plastic may stick a bit, don't worry. Use tweezers to pull bits off. Run a generous amount of glue where your top piece of lace will lay on the foam core board. In my case it was about the top 2" of the board. I laid the lace on top of that. Do the same for the bottom lace making sure to have about 3/4-1" hanging below the board. You should have about 1/2" extra on either side. Just wrap it around the foam core to the back side. Run your finger along the lace to smooth out any glue poking through the holes. Using another piece of plastic wrap cover your glued lace and put a couple books on top to weigh it down. Let it dry completely. You glue will dry clear. Remove books and plastic.


I cut two pieces of wood from the doweling I purchased at the craft store. Each piece was cut to 13". With a brad nailer or staple gun (this may be too thick for a staple gun- I didn't try it) attach the wood to the ends inside your crown. This will give your crown a nice rounded front.


Yup, I kinda missed. There was no easy way to pull it out without damaging something and so I left it.


The entire thing got a good coating of gold spray paint.


If you are putting this above a bed secure it to the wall with 'L' brackets. It could probably be secured with 3M pieces. Mine was a temporary installment so I didn't need to do anything drastic.  


These photos were taken with my phone. I forgot my camera that night!


And there you have it. Let me know if you try this project! 
Thanks for stopping by.


Partying on the blogs;
The Boondocks Blog, French Country Cottage, The Cottage Market, DIY Vintage Chic, Creatively Homemade, Life With Lorelai, The Charm of Home, The Pin Junkie, Pieced Pastimes, One More Time Events, Finding Silver Pennies, Nifty Thrifty Things, Create With Joy, Re Do It Yourself, Ducks n'a row, DIY Showoff, The Stonybrook House, Dwellings-The Heart of Your Home, I Should Be Mopping The Floor, Skip To My Lou, Plucky's Second Thought, Strangers and Pilgrims on Earth, Coastal Charm, Mad In Crafts, Cedar Hill Farmhouse, Celebrate and Decorate, Cupcakes and Crinoline, Home Stories A to Z, Lou Lou Girls, A Stroll Thru Life, Our Home Away From Home, April J Harris-Hearth and Soul, The Crafty Blog Stalker, Ducks n'a Row, The DIY Dreamer, Savvy Southern Style, My Repurposed Life, Gingersnap Crafts, DIY By Design, The Newlywed Pilgrimage, Katherine's Corner, The Vintage Nest, Joyful Homemaking, Have A Daily Cup of Mrs. Olson, Imparting Grace, Up To Date Interiors, The Pin Junkie, The Charm of Home

Thursday, February 2, 2017

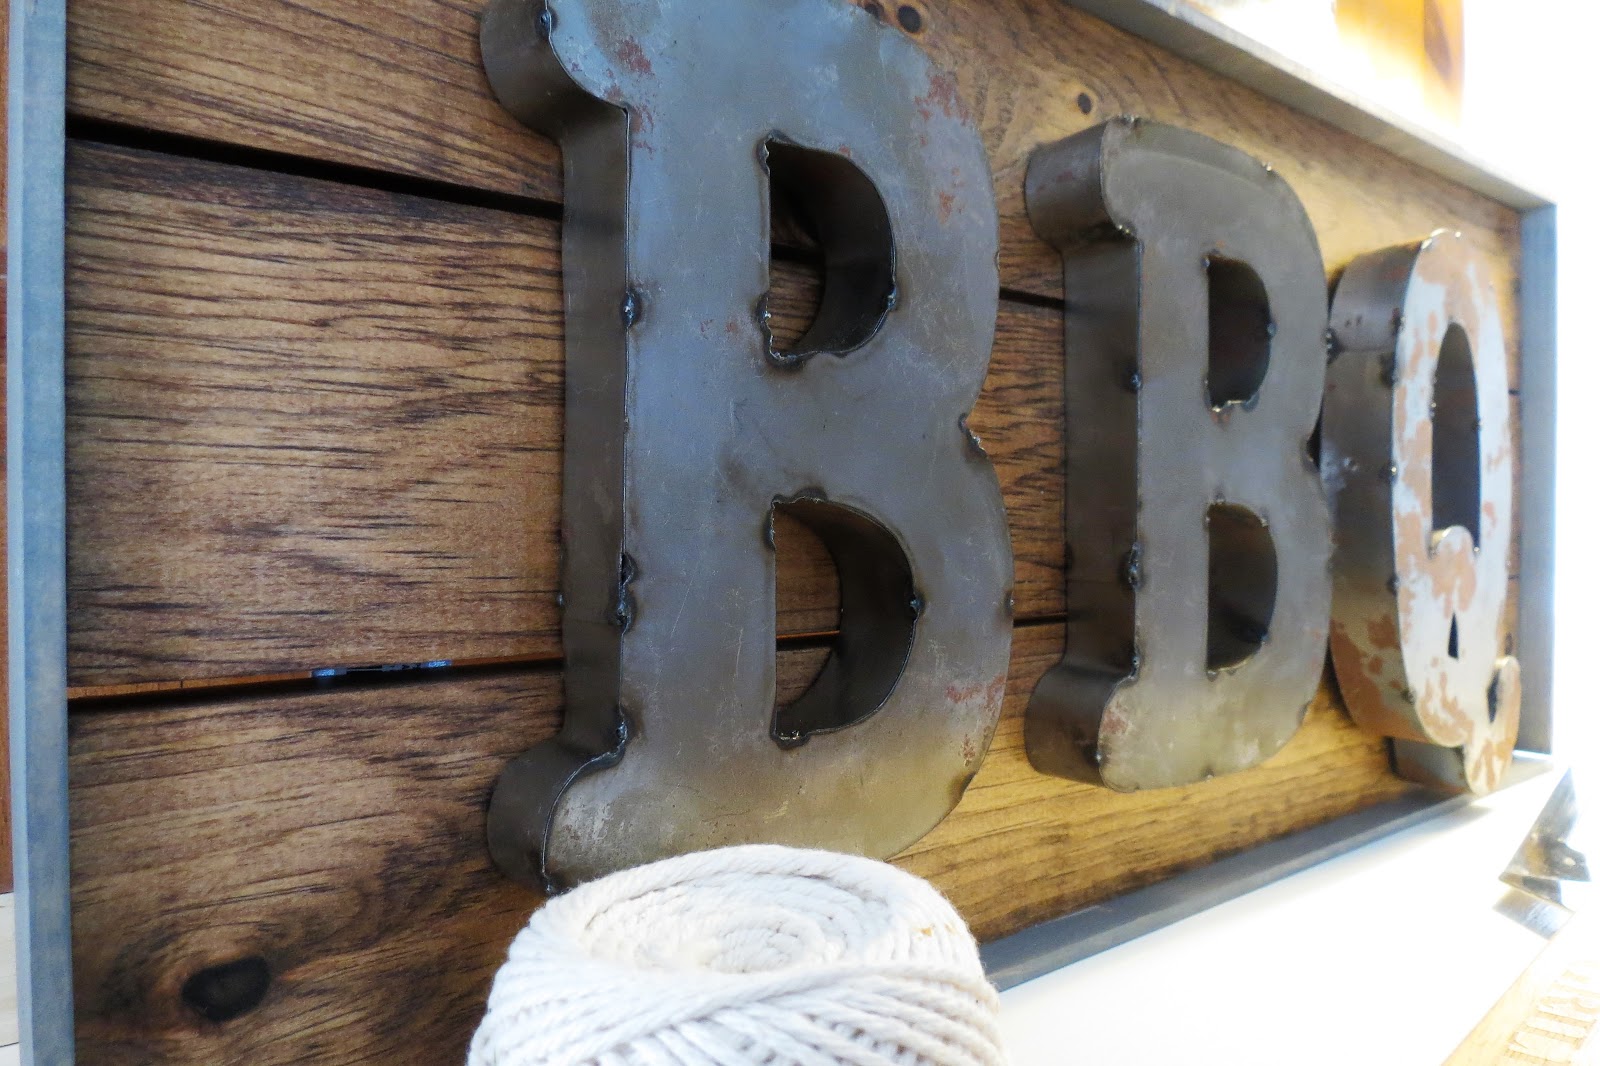
BBQ Sign Tutorial

On a trip to vintage and antiques fair last summer Mister picked up some tin letters and commented that we should make a sign for his barbecue area in the back yard. Hmm....I picked up two B's and a Q, with no specific plan-but, really, when has that stopped me?


Many weeks (or months) later inspiration struck and off I went to the hardware store. I bought one piece of 1x4 (which is actually 1 x 3.5). I bought an 8 foot length and cut three 24" lengths. Why not purchase a 6 foot length, you ask? You want to make sure to cut the end off so you have a nice, square end. Then, cut your lengths.


Apply a coat of stain making sure to get all the sides and ends. When the stain has dried turn the pieces face down. I used paint sticks for spacers and laid the three pieces next to each other.


The pieces were secured in that configuration using mending plates and screws. Make sure you are using short screws, less than the width of you wood, so that you do not go through the front of your piece.


I laid the metal letters on the wood and here is where I kinda thought uh-oh. There were no hangers on the backs of the letters.


How was I going to keep them on the wood?  I cut six small pieces of wood about 3/4 x 1 1/2". I traced the letters onto the wood for points of reference.


Then, just inside the trace marks I secured the small wood blocks where the flat part of each letter would rest against it. Since these are such small pieces of wood you want to pre-drill a hole in each first then screw them in, otherwise they will split.


My thought was that I could use the brad nailer to secure each letter on the blocks! Genius, right? Umm... no. The brad nailer could not pierce the metal. Now what? Super glue! I tried super glue for metal and wood. I walked away from the project for a few weeks during the Christmas season.

During that time I decided it needed a frame of some sort. I purchased a piece of flat trim from my local home store for a few dollars. None of my photos came out for this step! Sorry.  I cut pieces for the top, bottom and sides. All four pieces were stained Weathered Gray by Verthane. I used the brad nailer to attach them. While doing this step the letters started falling off! The glue was not holding! Gah!

New plan. I drilled holes in the metal letters where they met the wood blocks, being careful to avoid the screws that held each block in place. ( A word to the wise here, metal shards from drilling can be extremely sharp and go in like splinters only FAR worse! Keep sticky tape near by to clean off the drill bit and pick up the metal bits.)


I set the letters in place and drilled back through the hole with a very small bit into the wood block- again trying to avoid splitting. Don't go too deep; you want the nail to catch something.  I secured each letter, top and bottom to the wood blocks with a nail. It took a little finessing and a nail set as the trim work was in the way of getting a clean shot.


I did apply a coat of poly on the outside trim but left the inside wood with just the stain. I have not put hangers on the back yet as we are not sure where it will hang exactly so when we figure it out we will adjust accordingly.

Here is the finished product. I can't wait for warmer weather so we can take it outside and hang it!


Linking up to these parties!
French Country Cottage, The Cottage Market, The DIY Village. DIY Vintage Chic, Creatively Homemade, Life With Lorelai, The Pin Junkie, The Charm of Home, Chic On A Shoestring, Ms.Toody Goo Shoes, The Boondocks Blog, Pieced Pastimes, One More Time Events. The DIY Showoff, Finding Silver Pennies, Nifty Thrifty Things, Create With Joy, I Should Be Mopping The Floor, Skip To My Lou, Strangers and Pilgrims On Earth, Coastal Charm, Cedar Hill Farmhouse, Our Home Away From Home, Flamingo Toes, Cupcakes and Crinoline, Creatively Living, Plucky's Second Thought, Lou Lou Girls, Celebrate and Decorate, A Stroll Thru Life, A Bowl Full of Lemons, The Painted Hinge, Savvy Southern Style, The Newlywed Pilgrimage, Gingersnap Crafts, DIY By Design, Ducks n'a Row, My Repurposed Life, The Vintage Nest, Joyful Homemaking, A Cup of Mrs. Olson, A Delightsome Life, Up To Date Interiors, Charm Bracelet Diva, Olives n Okra, Craftberry bush, Imparting Grace, Home Stories A to Z, Mad In Crafts, The Crafty Blog Stalker

Friday, December 30, 2016

2016 Round-up and Review

2016 was a fun year for me full of changes and new adventures. The year started off rather slow. After Christmas and a brief break from the blog I struggled with what to jump back into blogging about, which project to tackle, do I have time, do I have anything to say.... blah, blah, blah.

Visits to the blog were as slow as my postings.  I watched the numbers of visitors trickle in. Then bam! My numbers started going crazy. I didn't know why. I could see that people were looking a post from 2015 but didn't know why the attention.

I did a few small projects like the Craigslist night stand and mirror.


We finished the room switch upstairs with the completion of the office/music room.


 Easter came and went. Then Mister called me one day in April and said something like "Did you know your blog was on Huffington Post?" What?? Wait...WHAT??? He sent me the link and there was my daughter's bedroom. Crazy, right? Turns out HP doesn't tell you when they use your work on an post; no warning, no collaborating, just boom~!

So, here are the top three posts visited this year.

#1)  Bedroom #2-Reveal (actually a 12/2015 post but it took off in 2016)


#2) A Craigslist Hutch Tutorial


#3) My Summer Kitchen


Top 3 posts according to Hometalk

#1) Old Girl-New Gig, Part 3- Bathroom Makeover Completed

This was the first "job" I've ever done for someone other than myself! (And, yes, I should have ironed that shower curtain!)


#2) Evolution Of A Gallery Wall


#3) DIY Art With A Sharpie


Top 3 posts according to me (my favorites).

#1) Stay Close


#2) Dreams, Fears, Miss Mustard Seed and Me


#3) Counter Chairs

Why this one? I LOVED the fabric on these chairs, number one. Number two, I dream of someday having a beach cottage and these chairs are what I envision in my beach home. Number 3, they are fun and a big change from how they started with little money and a little work.


There you have it; a year of writing and painting and fixing and making things around my home. I wonder what the new year will bring and what I can get into. A friend stopped over recently with her sons for a Christmas visit. They were amazed that nothing had been painted recently. I reassured them that there plans in the works for a couple of rooms to get a fresh coat of new color.

Just thinking about it now makes me want to get started but first I have to put away the Christmas decor. Ugh! I don't like that part but I do like the feeling of space when everything is put away.  And, school is back in full swing next week so I had better get busy!

Happy New Year to you, friend and thanks for the visits throughout the year! 


Friday, December 16, 2016

An Unexpected Christmas Gift In The Living Room- 2016

Christmas. I love this time of year. People are scurrying around to get that special gift for family, friends, cookies are baked and homes put on an opulent array of colors and sparkle.

I thumb through the blogs and magazines in October and November featuring bloggers and home decor lovers alike making preparations ahead of this procrastinator. I ooh and ahh over the lovely photos and make plans for what I will do in our home. This year I had dreams that I would decorate in gold, white and silver theme; snowy and frosty with a touch of warmth.  In my mind it was going to look something this:


This frosty scene ended up somewhere else and my home went a different direction. Honestly, I couldn't have gone farther from this wintery image! It all started with a painting that my mother gave me. You can read about that here.

The nostalgic feel, prompted by my village painting, migrated into the dining room and finally I finished the living room. Today, that is what I am showing you.


Making existing pillows Christmas ready took nothing more than some wired-edge ribbon and literally less than a minute. 


The pillar candles make their way into the decor in my home year round. Corralling them in a metal tray surrounded by some leftover roping and adding some pine cones gave a vintage inspired centerpiece for the coffee table. 


Remember the gallery wall from earlier this year?  A felt wreath and a little green, bows around the wooden animals and it's ready for Christmas. 


And because I can't help but play with the filters....


Now, about the tree...


I love shiny and new. I love the pretty whites and the monochromatic trees. I love seeing everyone else's beautiful creations...but....try as I might I can't seem to let go of the little things that help make my Christmas special. This little angel with a bucket of stars has been on the tree since I was a young teenager. 


And there are the ornaments that serve to keep me grounded in what we celebrate and why we celebrate. 


As I sat tonight editing these photos and thinking about the many blessings that are mine because of Jesus, the One I celebrate at this time of year, I was given a gift. I wasn't looking for it. It didn't come wrapped in pretty paper. 


Do you see it? Look again, see the perfect star? No filter, no trick done by me to make that! Wow.

Wise men followed the star, seeking the King of Kings. I would like to think myself wise but too often I prove myself foolish as I focus on the temporal. I love this blog and I love sharing with and hearing from you all. I am blessed by the sweet comments and the friendships forged here.

We have a week til Christmas. I am putting away these fun things to focus on Him, who called me by name and made me his own. I will, God willing, be back after Christmas. 

I pray your celebrations are filled with the knowledge, love and joy of Jesus Christ. 

Merry Christmas to you and yours. Blessed be the name of the Lord! 


Linky Parties
The Chelsea Project, The DIY Village, One More Time Events, Blooming Homestead, French Country Cottage, Chic On A Shoestring, Shabby Art Boutique, The Cottage Market, DIY Vintage Chic, McCall Manor, Olives-n-Okra, Ms.Toody Goo Shoes, Creatively Homemade, The Boondocks Blog, Finding Silver Pennies, The Chelsea Project, Create with Joy, The Stonybrook House, I Should Be Mopping The Floor, Plucky's Second Thought, Strangers and Pilgrims On Earth, Coastal Charm, Our Home Away From Home, Cedar Hill Farmhouse, Creatively Living, Celebrate and Decorate, The Dedicated House, Lou Lou Girls, Cupcakes & Crinoline, Flamingo Toes, A Stroll Thru Life, Cozy Little House, Dwellings-The Heart of Your Home, Savvy Southern Style, DIY By Design, Back 2 Simple Life, The Vintage Nest, Joyful Homemaking, Have A Cup of Mrs. Olson, The Pin Junkie, A Delightsome Life, Charm Bracelet Diva, The Charm of Home, Shoestring Elegance