Monday, November 18, 2019

Thanksgiving Thoughts 2019

My home has been decorated since September for fall. The blues and greens that I used in preceding years gave way to more traditional rusts and oranges this year. The front porch and dining room were shared in previous weeks. The freezing temperatures have killed off my mums on the front porch. I threw them out today and will start on Christmas out there this week.


But inside it is still fall.


I have so much to the be thankful for but today I am thankful for a set of sixty (maybe more) year old dishes.

My dining table had been set with everyday, plain, white dishes but they have now been replaced with my great-grandmother's dishes. My mom had married her grandson, my step-dad, when I was seven. The first time I met her I was about ten years old. We flew to Florida that year for Thanksgiving at her house. She was originally from New York City but had retired in Florida. We lived on a military base in Washington state so this was our first meeting.  I remember being struck by the fact that her dishes had turkeys on them! Her table was full of crystal serving pieces, silver plated dishes and real silverware as opposed to the flatware and Corelle ware that graced our table back home. People "back east" entertained differently then and way different from what this poor girl was used to. Imagine, plates that were just for Thanksgiving!


Two years ago I was enjoying some free time visiting some of my favorite blogs and I saw someone's post about their Thanksgiving dishes. It immediately sparked the memories of that ten year old girl. All my loved ones that are no longer with us were happy and well in those memories. I knew those dishes had been passed onto my mother a few years before she had passed. My dad had not gotten rid of them but also had no idea where they were. It took a trip to my dad's to find the dishes, pack them up and ship them home.


They are only out for a short time. They are not dishwasher safe, I don't think. (I wouldn't want to test it.) But to me they are worth the extra care and the extra space they take in my cabinets.

The table is set and ready for celebrations, conversations, and laughter. When I walk through the room during the day memories flood my mind. I can almost smell my great-grandmother's mincemeat pie. It was the first time I had ever had it or heard of it! It mingles in my brain with the fragrance of my grandmother's perfume, my grandfather's tall frame, and the sound of my mother's voice. I am thankful for these people that loved me so well. Even though they are no longer with us the dishes remind me of them and of that time; a time when my own version of the Norman Rockwell family was carefully sown into my brain. I had no idea at the time. I took for granted the gathering of family and, knowing me, I was probably bored out of my 10 year old brain with all the "grown up talk".

So now, how amazing it is to me that the memory is so precious that it ignites a heart of thankfulness. Thankful for the love, thankful for the memories and thankful for an incomplete set of dishes that are used for a very short time every year. Perspective is everything, friends.


May your Thanksgiving celebrations be filled with moments that plant memory seeds of family and love. I also pray that you are able to appreciate moments as they happen and that you intentionally take time to look at the faces, hear the laughs, see the eyes, feel the love (no matter how imperfect it may be) and to give thanks to God for the people He has put into your life. We and they are not promised tomorrow. We have today and today is enough to be thankful for.

Psalm 100:4 - Enter his gates with thanksgiving, and his courts with praise! Give thanks to him; bless his name!

Happy Thanksgiving, friends. 

Tuesday, November 5, 2019

When Things Don't Go The Way You Had Planned- Do The Next Thing


Friends, do you have those days when you cannot see what the future has for you?
 Do you have seasons you must to walk through and they make absolutely no sense as to how they fit into God's big picture? 
Do you struggle with your plans for the future looking like they are seemingly nothing more than dust caught in tornadic winds? 
Is the fog so thick that you cannot see where to place your next step? 

Sometimes all we can do is the next thing. You may be numb as you take that next step; not able to feel your legs beneath you but step you must. 

God has called us to a particular walk, a definite road, a predestined path. 

Proverbs 16:9
The heart of a man plans his way, but the Lord establishes his steps. 

The following is an old poem that encourages me in those seasons when the cares of this life make things so murky and obscure my view to what lies beyond this day. 

Do the Next Thing

From an old English parsonage down by the sea
There came in the twilight a message for me;
Its quaint Saxon legend, deeply engraven,
Hath, as it seems to me, teaching from Heaven.
And on through the hours the quiet words ring,
Like a low inspiration: DO THE NEXT THING.

Many a questioning, many a fear,
Many a doubt, hath its quieting here.
Moment by moment let down from Heaven,
Time, opportunity, guidance, are given.
Fear not tomorrows, Child of the King,
Trust them with Jesus. DO THE NEXT THING.

Do it immediately; do it with prayer;
Do it reliantly, casting all care;
Do it with reverence, tracing His hand
Who placed it before thee with earnest command,
Stayed on Omnipotence, safe ‘neath His wing,
Leave all resultings. DO THE NEXT THING.

Looking to Jesus, ever serener,
(Working or suffering) be thy demeanor.
In His dear presence, the rest of His calm,
The light of His countenance be thy psalm.
Strong in His faithfulness, praise and sing!
Then, as He beckons thee, DO THE NEXT THING.
(source unknown)

Whatever today brings for you, whatever tomorrow has in store- fear not beloved for you are His. 

Love, Jolena

Thursday, October 31, 2019

Fall Front Porch 2019

October flew by!

I always love decorating the front of our home. I see it as the first welcome our visitors receive and I want it to look like a place you just want to come in to. This time of the year as I drive past beautiful homes, I imagine life inside those homes filled with warm cups of tea or cider, the smell of gingerbread and candles a glow.

You probably don't live close but if you did that would be how I want our home to feel for you; kinda like a big welcoming hug.


Thanksgiving is four weeks away! I have so much to do between now and then! It seems I just get things set for the new season and it is time to change it all up again. I'm already thinking about Christmas decorations. If you're a home decor blogger or follow many of them you'll understand that I am behind...again. 

Oh well... I think I will grab a cup of tea and just enjoy the blustery weather outside and the glow of candles inside. 

Party Links:
Katherine's Corner, The Pin Junkie. Grammy's Grid, Life With Lorelai, Shabby Art Boutique, Happiness Is Homemade, Our Home Away From Home, The Dedicated House

Tuesday, October 15, 2019

Fall Fireplace Mantel

Autumn in New England is a beautiful thing. The air turns cooler, the leaves turn multiple shades of amber, topaz, crimson, and gold. Nights are chilly and brisk mornings clothe themselves with a frosty mantle. All these serve to beckon one to take refuge from the cold in front of a roaring fire, warming the toes and nose while enjoying all things cozy and snuggly.


This year, thanks to my faux fireplace (tutorial here) , I get to enjoy at least the thought of that if not the actual warmth of a fire.

A wool garland,  purchased at Home Goods, was doubled over and attached to the mantel using cup hooks I screwed in underneath the mantel top.


Faux Chinese Lantern flowers were placed in a black basket and a black framed mirror were place atop the mantel along with some velvet pumpkins collected in years past. I reused a boxwood wreath from another room in the house. A strand of warm lights and a candle finish off the mantel dressing.


A favorite set of placemats sit on our dining table, holding chargers and simple white plates. Orange plaid napkins are adorned with clear and gold beaded napkin rings. Each place setting is accompanied by gold plated utensils and marmalade colored water glasses (actually, they're plastic from the dollar store).


Down the center I placed a table runner in creamsicle orange. I used my metal tray I purchased last fall. I filled it with pumpkins I had painted last year and reused the gold ones from a few years ago. A berry garland and pumpkin colored, battery-operated candles fill in the tray. Reuse what you have. Find different ways to reuse them or use them in different places than the previous year.


Sometimes you just want to do something different all together or perhaps you're just tired of the same ol',  same ol'. That is how I felt about some of my "primitive" fall decor and some of my burlap stuff so I sold them on a local site and used the money to buy a few things to freshen up my autumn displays. And sometimes something entirely new, like my fireplace, is just what the room needs.


Happy All-things-cozy, Happy Frosty-mornings-snuggly-throws, Happy Fall, Happy Autumn! Thanks for spending time here. I hope you found some inspiration or just grabbed a little "me time". 

                                                                         Jolena
Linking to these parties: 
The Dedicated House, Our Home Away From Home, The How To Home, My Uncommon Slice of Suburbia , Create With Joy, Home Stories A to Z, April J Harris, My Repurposed Life, Lou Lou Girls, My Wee Abode, Fluster Buster, Oh My Heartsie Girl, Across The Blvd, Zucchini Sisters, Follow The Yellow Brick Home, Love My Little Cottage , Ducks N'A Row, 2 Dishing Divas

Tuesday, October 1, 2019

Wood Sign Tutorial

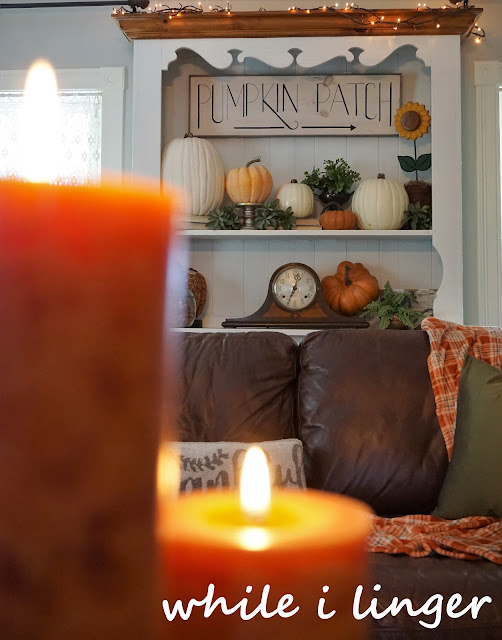
Sometimes updating your decor can be a simple as going your the scrap wood pile. I wanted a sign to hang over a collection of pumpkins. I scoured the internet and fellow bloggers to find something I could settle on then decided to see what I could do on my own for no money, or at least only a little money.

I found a piece of scrap pine from my faux fireplace in the garage.

** I didn't do this next step first! I realized it only toward the end of the project. Don't wait, do it first.  I had not made sure that my wood was squared to begin with. Often when you buy a length of wood from the store you need to fresh cut the end to be sure that it is square before measuring out your piece. Turns out all was good-whew- but do this first!!

Using a piece of chalk and a ruler I measured out equal distances from the edges and then hand traced a semi-circle because I wanted my letters to make that shape on the bottom of the words but straight on the top.


I want my sign to read PUMPKIN PATCH. Counting letters and spaces, divide by 2 and that will give you your letter that should be in the center of your sign. I my case it was the letter N. I start with writing that letter first, in a VERY light pencil. I use pencil because I want to do this with a marker and it won't trace well over the chalk.  Continue writing letters out from the center. (You could use a stencil if you don't feel confident free-handing this step.)

Once the letters were spaced I decided I wanted to paint the wood! Yes, this is going to cover up my letters... I compromised and mixed paint and water, 50/50 and brushed it onto the wood. I could still see my pencil markings. Allow to dry.


I took a Sharpie Fine Point marker and my ruler and traced my pencil markings making sure to keep everything straight, use the top of your ruler or a t-square to keep your letters perfectly perpendicular to the top and bottom.


Next I used the Sharpie King Size to emphasize the down strokes. Following some of my limited calligraphy knowledge, I kept the pen angled at about 45 degrees to give me a chiseled edge on the top and bottom.

I did draw an arrow on the bottom, making sure to measure first to insure a level and well spaced placement. At this point I decided I wanted to frame my piece.

As a note of encouragement (and full disclosure), I did not master this the first time through but learned from my mistake and turned the wood over and worked on the other side. Worse case scenario, sand down your mistake and start again.

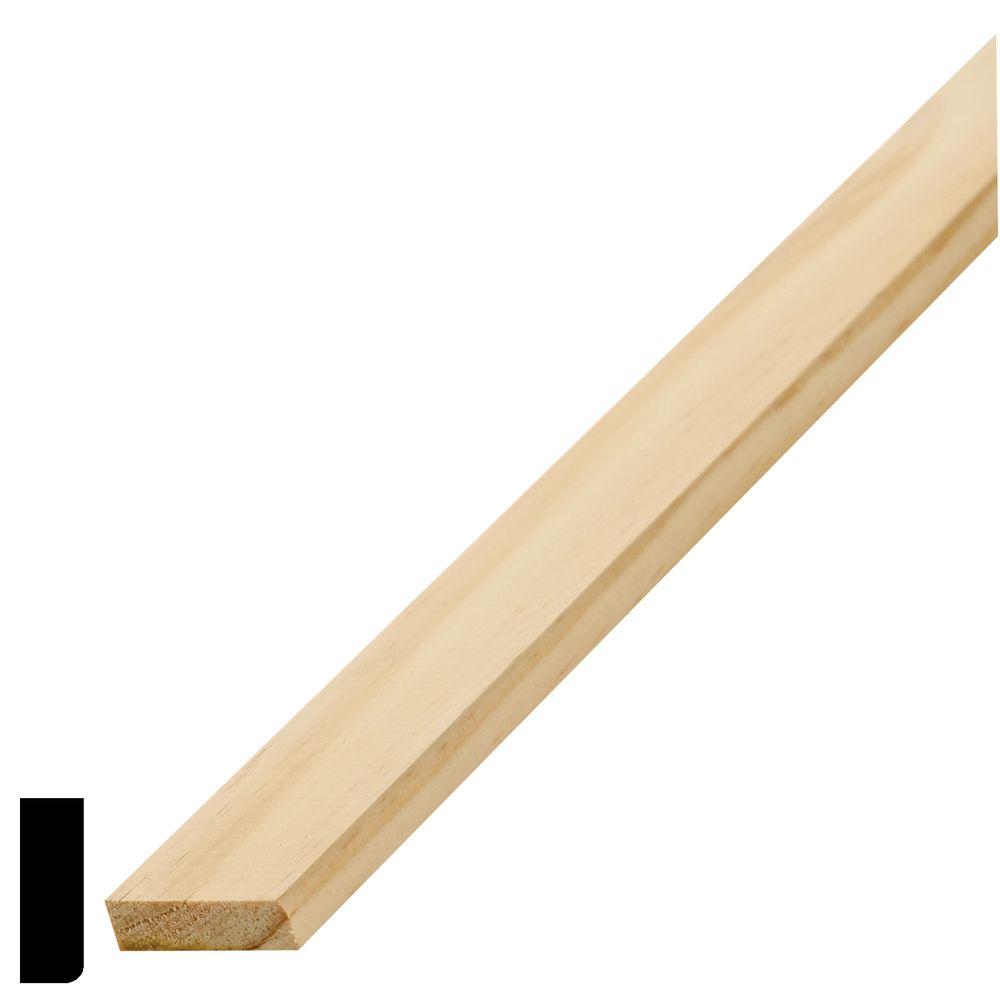
I picked up some thin trim wood, pine stop molding, for about $1 per foot. I needed about 8 feet for my piece. I'm not going to try to miter this stuff so I will cut the side pieces the exact size of the sign and the top and bottom long enough to cover the sign with the side pieces attached.

                                                           
                                                              Source

I used some stain I had on hand from other projects. The color I used was a weathered gray.

Once the pieces were dry I drilled very small holes (big enough for finish nails) in all the trim pieces, 4 in the top and bottom and 2 on either side. Using wood glue and finish nails I attached the trim pieces. I attached a hanger in the back and placed it in my pumpkin display.


Because I had much of the materials on hand this project cost me about $8. Not bad!

Linking Up!
Ducks N'A Row, Our Home Away From Home, DIY By Design, A Stroll Thru Life, My Repurposed Life, April J Harris, The How To Home, Fluster Buster, My Wee Abode, Across The Blvd, Home Stories A To Z, Grace For A Gypsy Katherine's Corner, Create With Joy, Imparting Grace, Life Beyond The Kitchen, French Ethereal , Oakhill Homestead, Our Hopeful Home, My Girlish Whims, Zucchini Sisters, Knick Of Time, Raggedy Bits, Life With Lorelai, Shabby Art Boutique, The Pin Junkie, The Cottage Market, Pieced Pastimes, Love My Little Cottage, Create With Joy, Lou Lou Girls, The Answer Is Choco, A Glimpse Inside Blog, Mad In Crafts, Finding Silver Pennies, Blue Sky At Home, The Dedicated House, Grammy's Grid, Follow The Yellow Brick Home, 2 Dishing Divas

Tuesday, September 24, 2019

Faux Fireplace Tutorial


As Summer says goodbye and Autumn makes its appearance, my thoughts turn away from warm beach days to all things home. The weather has been instrumental in helping me with the hard-for-me transition. Summers are so very short in New England.


This year I have an added incentive to get ready for the fall... I have a fireplace! Well, sort of. Originally, when the house was built it had a fireplace in the middle of what is now our living room.

By the time we became owners of the 200-ish year old home the fireplace was gone and a chimney was built on the outside wall, to service the oil furnace. Old houses have smaller rooms so finding a place for a real fireplace without major reconstruction is near impossible and definitely out of the budget.

Meanwhile, my inbox seemingly was being inudated with posts from bloggers I follow showing off their mantels for each season; tutorials on how to style them, ways to change them up and add to them... on and on and on. Delete, delete, delete... it was very sad. Doesn't it always seem like the thing that you can't have is the very thing EVERYONE else has?  I know, I was coveting my neighbor's fireplace... I know! But the struggle was still real, after all where do I hang my Christmas stockings each year?  I always dread that dilemma. I know, first world problem, But I had a remedy.

So, I decided this summer that I was gonna get me a fireplace. I started squirreling aways ideas. Remember this from the Pro.found Vintage Market post?


I scoured the internet, pinned all the faux fireplaces and mantels I liked. With a yardstick and a piece of chalk in hand I drew on the wall a rudimentary version of my fireplace. Mister is a visual guy so he needs to really see it; he needs something tangible in order to get on board. That's just the way we work. Once I had him committed to the idea I grabbed my graphing paper and drew it up. I want to make as little cuts as possible so we are going to work with standard widths to minimize the work.


                                       (My preliminary supply list was tweaked a bit)

We found a set of corbels at a local antique store and I thought we would use them to support the mantel. When we tested it on the wall we realized that the whole thing would stick out too far on the wall, using up valuable space in our 10x11 foot dining room. The whole thing needs to be low profile. The corbels would have stuck out 8 into the room and then a mantel on top of that... too much.

So, a trip to our local home improvement store and the purchase of some lumber was the next step. I thought I was going to build this myself but Mister gets nervous when I try to use power tools. (He also has a hard time not being the one to use tools. Lucky me!) I want all the screws hidden. Even though everything was going to be painted white I still don't want to see or have to try to fill, sand and hide screws and nail heads. That meant we had to buy a Kreg pocket hole jig. We will use it for other projects but it did bump up the price of my project.


Materials:

2 6ft-1x8
1 4ft-1x10
2 6ft-1x6 (nicer, select wood-no knots)
2 6ft-1x3
7 6ft-1x2
1 6ft-1x6
Pocket screws
1 1/4" screws

pocket hole jig
fresh saw blade - these I did not include in the price of my project because they will be used elsewhere and you may already have them.


Step 1:
Fireplace surround base. Working from the backside of wood (that will sit against the wall-watch knots and imperfections on the face) we pocket screwed and glued the two 1x8x6 (cut to 52" in length) to either end of the 1x10x4 (cut down to 33" in length) forming a "U" shape. This will give our finished product a width of 48" on the wall. Remember wood widths are not true; 8" is really 7 1/2", 6" is really 5 1/2", etc.


Step 2:
Lay the 1x6x6 on top of the face of the 1x8s, down either side of the surround. Mark your length to exact of the 1x8's and cut, (approximately 52") We spaced these right in the middle, with even spacing on each edge.  Glue in place, screw to secure from the backside. **Make sure your screws are only long enough to grab both layers of wood but not pierce through the top layer. We pre-drilled and countersunk 1 1/2" screws.


Step 3:
Build out the profile. We want this to stand out a bit from the wall but not too much. We used 1x2s for this set on edge. We cut each one to length; the outside and inside and top and bottom of the top plate. Pre-drill your holes to prevent splintering or cracking these small pieces. Glue edges and screw into place.


Step 4:
The middle top plate will have a small inset so we framed that portion out using the 1x3. These had to be cut to fit perfectly between the 1x6's. And that is it to the "surround" portion of the fireplace.


Step 5:
The mantel. We went back and forth on this as we don't want it to stick out too much. We went with a 6" depth (smaller than the corbels we purchased). We cut it to overhang the base by about 3 inches on either side. We finished the edge with 1x2s, mitering the corners and securing with wood glue and pocket screws. This gives the mantle a thicker look. We attached it to the base with more pocket screws so no evidence from the top!


Step 6:
Corbels. I still want to use these but how? They are about 3 inches thick!  I wanted a curve-y something happening in the center to soften the very masculine table we purchased this year. Mister came up with the idea to use the corbels in the inset part. Perfect! He cut away some of the material so that the would set snuggly around the stepped in opening. They were glued and screwed in from the back side.


Step 7:
Sand, paint and install. There are a few ways you can install. We opted for a wall cleat.

My fireplace will "hang" on the wall with the aid of a wall cleat. For this we used a spare piece of 2x4 cut in 1/2 on the diagonal. One part was secured to the back of the fireplace surround and the other piece to the wall. We were able to determine where that should be when we dry-fitted the surround on the wall. We removed the baseboard for this. We will replace it on either side when installed.


Sorry in advance for this next picture. I painted the wall with chalkboard paint where the "fire box" will be. My fireplace will not have a back on it because I don't want to spend money on plywood. I always have chalkboard paint on hand! I saw this idea on a blog called Sophia's Decor.


While the chalkboard paint was drying the fireplace surround got a good sanding and 2 coats of paint to match the trim in my dining room. 

When everything was dry we hung it on the wall and Mister replaced the baseboard. 


Now it is ready for me to decorate for the Autumn season! I'm so excited and it is helping me to ease into the idea that Summer 2019 has come to a close. 

So, what do you think? This project took an afternoon to build, another day to sand and paint the piece, the wall and fix the baseboard. (I could have been done in one day but we quit when we got the construction part done.) 

                                                  The price for my new fireplace:$120

                                      Somewhere to hang Christmas stockings: Priceless
Time to decorate! 

Linking up to these parties!