Monday, June 26, 2017

Arm Chair Makeover


A while back (like maybe early last fall) while utilizing my time wisely... okay, while perusing the Facebook yard sale sites, I found a set of wood arm chairs that stopped me in my tracks. I have been looking for a chair to pair with my grand-mother's French table.


I love this table. I am not sure what it was intended to be. My grand-mother purchased it when stationed in France with my grand-father. He entered the military during WWII and trained as a pilot. In the 50's they were stationed in France. My grand-mother loved cooking and she loved Julia Child! I suppose I can understand though my cooking crushes are more along the lines of the Pioneer Woman.  I imagine this table would have been lovely for rolling out pastry dough because of it's stone top but it is short. Perhaps it was a bistro table of some sort? I am just not sure. I do know that over the years it was used in different ways. She used it as a sewing table at one time. At some point it was passed down to my mother and she kept it outdoors on the covered patio adorned with potted plants. When my dad downsized, after mom went home, the table became mine. It has been to France, Korea, the Carolina's, Florida, Arizona, and now Massachusetts. It should have a passport!

Being so well traveled, I think she deserves a pretty chair that compliments her. Where do I go? I'm sure you can think of some pretty nice stores or online avenues that have beautiful, worthy options but that's not my first stop. I love the hunt... and a bargain and couldn't pass up the opportunity to buy two chairs for $30. (I think that is what I paid...it has been a while.) Where? On a local yard sale site on Facebook!  I have never reupholstered a chair before but figured I couldn't mess it up too bad. Right?

Life happens and these chairs sat for months without any attention. One day in December I decided to take off the cording and fabric. This is a tedious job! The little staples are a bear to take out but I persevered and eventually I was left with a naked seat. I kept the fabric, as I will use it as my pattern for the new seat cover.

Two months later...

I would paint the chair in a white chalk paint, I decided, one snowy afternoon.  I had paint from another project on hand and went to town until I ran out of paint. Ughhhh!


It turned out for the best. As the chair sat there mocking me for not having had enough paint to finish the project I realized she was not ever supposed to be white. I purchased some chalk paint from Lowes in black. This was an expensive can of chalk paint! I wanted to try the product vs. making my own. I don't know that I would do that again. The chair ended up taking three coats. Patience is the name of the game when tackling all the little cut-out area. I kept missing places that I thought I had gotten.


I allowed the chair to dry for a few days. After I was sure the chalk paint was completely dry I gave the whole piece two coats of a clear, satin finish to protect the paint. This chair will be used and I want it to last a while.


I went to my local fabric store, coupon in hand, and shopped for the perfect fabric. Everything I was looking at just wasn't appealing to me. I don't want the chair to compete with the table. I scratched that idea of finding traditional fabric and headed to the home improvement store. I purchased a medium weight drop cloth (hallway sized) and cut it in 1/2. I laid my fabric that I had removed from the chair onto the drop cloth and cut out a piece approximately 1 1/2 inches larger.


Using my regular old staple gun I stapled the fabric onto the chair; one staple on the back, pull taught to the front and staple. I did the same on either side and then started filling in, smoothing and tucking where necessary.


Now I needed cording. Ugh. Why didn't I think about this first? I know you can make cording by cutting your fabric on the bias and blah, blah, blah but I am not ever going to do that. I know my limits. How can I get around this??? Back to my fabric store.... They had nothing pre-made that would work with my chair and fabric. I don't want it to stand out. Finally, I grabbed some cording filler; this is the stuff that you cover when making your own cording...and, again, we all know I am not going to do that.


Instead, I am going to just glue this directly over my staples! Crazy? Maybe, but I am going to make it work.

First I trimmed the excess fabric close to the staples.


Then, I grabbed my handy-dandy glue gun I glued the cording over the row of staples. When all was said and done I was sort-of happy. I could see some of my glue and I could see raw edges still peeking out.


I headed back to my fabric store and bought some more cording.  I applied a second row and that was the trick! This is just a cotton and I am worried that it may pull and come undone. Using watered down Modge Podge I brushed over the cording, not to saturate but to just seal it and bind it to protect it against wear.  Perfect? No, but for my first try I am happy with the results. I will live with it for a while and see how it goes. I have the matching chair waiting for a makeover. My plan is the sell that one but we will see how well this one lasts first. Maybe I will sell this one and keep the second one...


My table and chair work beautifully together, now. I think my grand-mother would approve. 


Thanks for for hanging out with me today! I would love if you followed me regularly either by signing up to follow by email or on social media. All the links are in the right side column. 

Linking up to these parties:Stone Gable, The Dedicated House, A Stroll Thru Life, Home Stories A to Z, The DIY Dreamer, Savvy Southern Style, My Repurposed Life, Gingersnap Crafts, DIY By Design, Ducks n' a Row, My Thrift Store Addiction, Gratefully Vintage, The Vintage Nest, Joyful Homemaking, Have A Cup of Mrs.Olson, The Pin Junkie, Up To Date Interiors, The Charm of Home, Life With Lorelai, Katherine's Corner, Shoestring Elegance, French Country Cottage, Chic On A Shoestring, The Cottage Market, The Boondocks Blog, Unique Junktique, Pieced Pastimes, Blooming Homestead, Olives-n-Okra, The DIY Village, Ms. Toody Goo Shoes, Finding Silver Pennies, DIY Showoff, Nifty Thrifty Things, Dwellings-The Heart of Your Home, Create With Joy, The Stonybrook House, The Chelsea Project, Reasons To Skip The Housework, The Painted hinge, Life On LakeShore Drive, Coastal Charm, I Should Be Mopping The Floor, Cupcakes and Crinoline, Plucky's Second Thought, Shabby Art Boutique, Our Home Away From Home

Tuesday, May 16, 2017

Living Room Makeover

Do you ever think you need to spruce things up but don't want to just ditch everything? Or, maybe you do want to ditch everything but can't afford to do it all at once... Well, that is what I was faced with when a friend asked for help in her home. She will be hosting a bunch of guests in the upcoming weeks as her daughters graduate; one from grad school and the other from high school. I had a $1000 budget and went to work.

A few weeks ago I shared with you the fireplace makeover. This was an inexpensive update and an easy-peasy DIY project that took less than a day. The brick is actually brick-face and the surround sported a dated brass finish. Originally, I thought the style to be 1970's-ish but have since learned the house was built in the 60's. I do think all this was original and thus in desperate need of a face lift.


Without making the room look overdone she wanted a feel of the ocean in the room. I chose a soft shade of gray/beige for the walls. It reads more gray but browns work well with the color, too. I used Sherwin Williams Grayish for the walls and Sherwin Williams Pure White for the trim. I carried the color down the hallway and stopped at the adjacent dining room wall (for now). First, let's take a look at some BEFORE photos.


The living room has a large three piece picture window. Privacy is an issue. For convenience, maintenance, and economical reasons I chose faux wood blinds in a chestnut color. These were ordered to fit inside the framing. I purchased them on line through Home Depot. I framed them with four curtain panels. I reused her curtain rod and fed the panels to hang on either end as well as where the windows divided. These provide color but don't need to be moved as the blinds are more than adequate to provide privacy.


The mantle, purchased on line through Home Depot, was not finished as I wanted to try to finish it to compliment the blinds. I applied Minwax English Chestnut and two coats of polyurethane, allowing each coat to dry thoroughly.

I purchased an 8x10 area rug from Lowes. In my local store they have a section set up that has curtains, rugs, accessories and paint all displayed in complimentary groupings. This makes it super simple for people who are afraid to make those decisions.


Family is extremely important to my friend and she wanted to be sure her photos were a part of the space. There were over 30 photos! Frames can be expensive. I shopped in Walmart and craft stores for inexpensive frames. I did not want them to all be the same, I chose three colors/styles; black, white and gray.

I found a television cabinet on a local Facebook page for less than $100. I loaded that puppy up in the back of my SUV, brought her home, cleaned her up and she was ready for the new room.


Simple candle sticks and candles from a discount store adorn the mantle. I had a jar I filled with purchased 'beach glass' and some silk hydrangea from the craft store.


Soon there will be a family portrait above the mantle painted by one of the daughters. Presently, it is in an art show so I lent my framed poster print by Edward Hopper. I think it's called Coast Guard Station. I cut the poster to fit my frame and it hung in my bedroom for about ten years until I just recently redecorated in there. I think it stands in nicely until the permanent artwork is available.

I bought a throw blanket to bring some of the colors in the curtains to the other side of the room. A tray (which was actually a unclaimed lid to a box at Home Goods that I got for a few dollars) and a fake plant sit atop the two footstools doubling as a coffee table. A couple homemade art pieces rounded out the accessories in the room. A galvanized letter for the family's last name and galvanized clock are incorporated into the gallery wall over the television.


Eventually, my friend will purchase new furniture but for now this will work. It looks neat, clean and comfortable. She is happy with the results and so I am, also. As finances become available we can move into other parts of the house but for now we can all agree that this was a welcome and much overdue makeover.


Thanks for stopping by and taking time to read through this post. If you enjoyed visiting with me please consider subscribing by email or following along on social media. All the links can be found in the column to the right.

Hope you have a great day! ~Jolena


* This post was in no way sponsored by any of the companies or products mentioned in the post. Although, I would not be adverse to considering an affiliation. :)

Parties I attend: 
The Chelsea Project, Cedar Hill Farmhouse, Coastal Charm, I Should Be Mopping The Floor, Skip To My Lou, Creatively Living, Plucky's Second Thought, Strangers and Pilgrims On Earth, A Stroll Thru Life, Our Home Away From Home, Ducks n'a Row, The DIY Dreamer, Savvy Southern Style, Home Stories A to Z, The Newlywed Pilgrimage, The Dedicated House, My Thrift Store Addiction, Mad In Crafts, The Crafty Blog Stalker, Lou Lou Girls, Celebrate & Decorate, DIY By Design, Gratefully Vintage, Gingersnap Crafts, Mom Skills, The Vintage Nest, Joyful Homemaking, Have A Cup Of Mrs. Olson, The Pin Junkie, A Delightsome Life, My Repurposed Life, Imparting Grace, The Charm Of Home, Up To Date Interiors, Our Hopeful Home, Katherine's Corner, Craftberry Bush, French Country Cottage, the DIY Village, Life With Lorelai, The Boondocks Blog, Shabby Art Boutique, The Cottage Market, DIY Vintage Chic, Olives N Okra, Ms ToodyGoo Shoes, Pieced Pastimes, One More Time Events, Finding Silver Pennies, Nifty Thrifty Things, Reasons To Skip The Housework, DIY Showoff, Create With Joy, Re Do It Yourself, Stonybrook House, Frugal Mommas, Life On Lakeshore Drive, My Pinterventures, Dwellings-The Heart of Your Home, I Should Be Mopping The FLoor, Plucky's Second Thought, the Newlywed Pilgrimage

Monday, May 8, 2017

My Dreaded Chore; A Work Of Delight

Spring time for me is like catching your breath after holding it for sooo long. I can't wait til the days are warm enough to get outside and start the clean up. Garden beds need dead leaves removed, old stalks cut back, weeds pulled and a good basic cleaning. I am not a fussy gardener. I am rather lazy, truth be told. I like to plant something once and leave it-hence the lazy part.

As much as I love the color that comes alive and the flowers that come in an out of season there is one thing about all this beauty that I dread.... weeding! Weeding. (sigh) I know that weeding is going to make my hands hurt, the next day I am not going to be able to walk right because of all the kneeling and deep knee bends. I'm going to be dirty, sweaty, my eczema will blow up on my hands and wrists from the work gloves, and I will have heebie-jeebies thinking deer ticks are hiding on me. I'll be scratched and pricked from rose thorns and cactus. I will attempt to do everything in one day because I know that it will be so unpleasant that I will not want to go back at it the next day. That only adds to the pain.

But...as I am on my hands and knees, lamenting the fact that I should have let my city-boy husband just pave the whole thing when we moved in, God is faithful to meet with me.

Each blade of unwanted grass is a reminder of the curse. Because of Adam's sin the ground was cursed. Why is it so hard to pull up? Thoughts of my own sin creep in. Why is it so hard to let go of some of the things I struggle with? Why can't I just repent of them and be done with them. They hold onto me tightly not wanting to be eradicated. At times, the best I can manage is to pull the tops off but the roots are left to spring up anew; much like this  ajuga weed that pops up everywhere.


Why do the weeds grow up in the midst of my flowers? How do I get them out without disturbing or pulling up the things that are meant to grow there? I think about how Jesus said the the wheat grows up with the tares (weeds).

Matthew 13:24-30 He put another parable before them, saying, “The kingdom of heaven may be compared to a man who sowed good seed in his field, but while his men were sleeping, his enemy came and sowed weeds among the wheat and went away. So when the plants came up and bore grain, then the weeds appeared also. And the servants of the master of the house came and said to him, ‘Master, did you not sow good seed in your field? How then does it have weeds?’ He said to them, ‘An enemy has done this.’ So the servants said to him, ‘Then do you want us to go and gather them?’ But he said, ‘No, lest in gathering the weeds you root up the wheat along with them. Let both grow together until the harvest, and at harvest time I will tell the reapers, “Gather the weeds first and bind them in bundles to be burned, but gather the wheat into my barn.”’”

The lesson here is plain, right? But God pressed and I considered how wheat and tares grow up in my own heart. The good things I do are intermingled with my sinful desires and attitudes.  My motives, good and bad, are thriving together in the same soil. My flesh, old nature, old man is the enemy of God and loves sin. Like Paul I can bemoan my condition: 

Romans 7:18-20 For I know that nothing good dwells in me, that is, in my flesh. For I have the desire to do what is right, but not the ability to carry it out. For I do not do the good I want, but the evil I do not want is what I keep on doing. Now if I do what I do not want, it is no longer I who do it, but sin that dwells within me.

Each spring I come to my gardens and see things growing that seem pretty, good to the eye. Sometimes I don't know they are weeds until they reach maturity. Sometimes I suspect they may be weeds but I take a wait and see attitude. And, sometimes I know they are weeds but I leave them because I like their beauty. 


Hebrews 11:24-25 By faith Moses, when he was grown up, refused to be called the son of Pharaoh’s daughter, choosing rather to be mistreated with the people of God than to enjoy the fleeting pleasures of sin.

Weeds can be beautiful and sin is pleasurable...but that is part of a master deception. Weed's beauty and sin's pleasure are fleeting- they don't last. They have no eternal worth. The fact of the matter is that they are destructive, eternally destructive left unchecked. Weeds, no matter how beautiful, will only grow more weeds. When left to their own they will choke out or overtake a bed of beautiful, cultivated flowers. While the weeds are growing up next to my flowers, herbs and vegetables they are stealing the good food from the soil that is meant to nourish my beloved blooms. As sin in me is left unchecked or allowed to flourish it, too, will only serve to overtake the good things that God has worked in me.

As master of my gardens it is my job and joy to tend my gardens just as it brings God delight to tend to his children. It grieves my sinful, broken heart to see all the mess of these early spring beds but how much more does it grieve my holy, perfect, heavenly Father to see the weeds of sin that have sprung up in me?  In my garden it is at my discretion to allow the weeds to grow with my plants so that I do not destroy the good just as God does with us. Occasionally, I have to make the hard decision to turn the whole bed over and remove the good with the bad.... This is also God's prerogative. 


I pray that as I spend the next few months tending to the gardens and enjoying the sunshine that God will continue to meet with me there. I pray he continues to pluck up the weeds of sin making way for the beauty, cultivated by his hand, to flourish. As he does this in me I pray that I can be faithful and not fearful to share with you what the Lord is teaching me, that it might also bless you.  I praise my God that even in the chore I dread he is so gracious to turn my thoughts to himself, while on my knees he feeds my soul, and he makes my work a delight. 

Sunday, April 30, 2017

Brick & Brass Fireplace Makeover In A Day

This quick update is a one day commitment and can cost $30 or less, depending on what you have on hand.

A friend recently asked for help in her home. She and her husband work and have two daughters. Time is a commodity and her home has not had much updating since she moved in. She wants something light and fresh, maybe with touch of coastal/beach. (Insert; me happy dancing!) Her oldest is graduating college and her youngest is graduating high school in June. There will be parties and visitors and the clock is ticking. While she would like to do the kitchen, dining and living room we have decided to focus on the living room for time and budget sake.


My first hurdle was one wall in the living room. It is covered with faux bricks and an off-centered fireplace with a dated brassy-gold metal surround.

                                              *Sorry for the bad photo. I used my phone.

The family cleared the living room and took off to visit colleges leaving the room for me to work in for two days. First up was that brass surround. I tried to remove it-that was plan A, but no luck. It wouldn't budge. Okay...I am not deterred. Plan B- I taped of the glass on the fireplace screen and taped paper around the brick to protect from over spray. I put a paper inside the fireplace in case any paint made it through the cracks. I put down drop cloths (-everywhere!!) and grabbed my high heat Rustoleum spray paint. ($7) I used black.

Product Image 1

This took 3 coats. If you are attempting this here are my pointers: Open windows between coats (to prevent the paint from blowing around). Follow the directions and allow each coat to dry. Three thin coats are much better than a thick coat that may run and ruin your project. Start spraying on the paper then in a back and forth motion spray your frame, being sure to keep the appropriate distance. Take your time.

Now to tackle the rest of the wall. There were bricks that had come dislodged. I reapplied them with Liquid Nails and taped it in place to dry. Some of the bricks were cracked. I used spackle (I had this on hand) and a small putty knife to fill the cracks. I was not too concerned about smooth surfaces. Once the cracks were spackled over I grabbed my white and off white chalk paints.

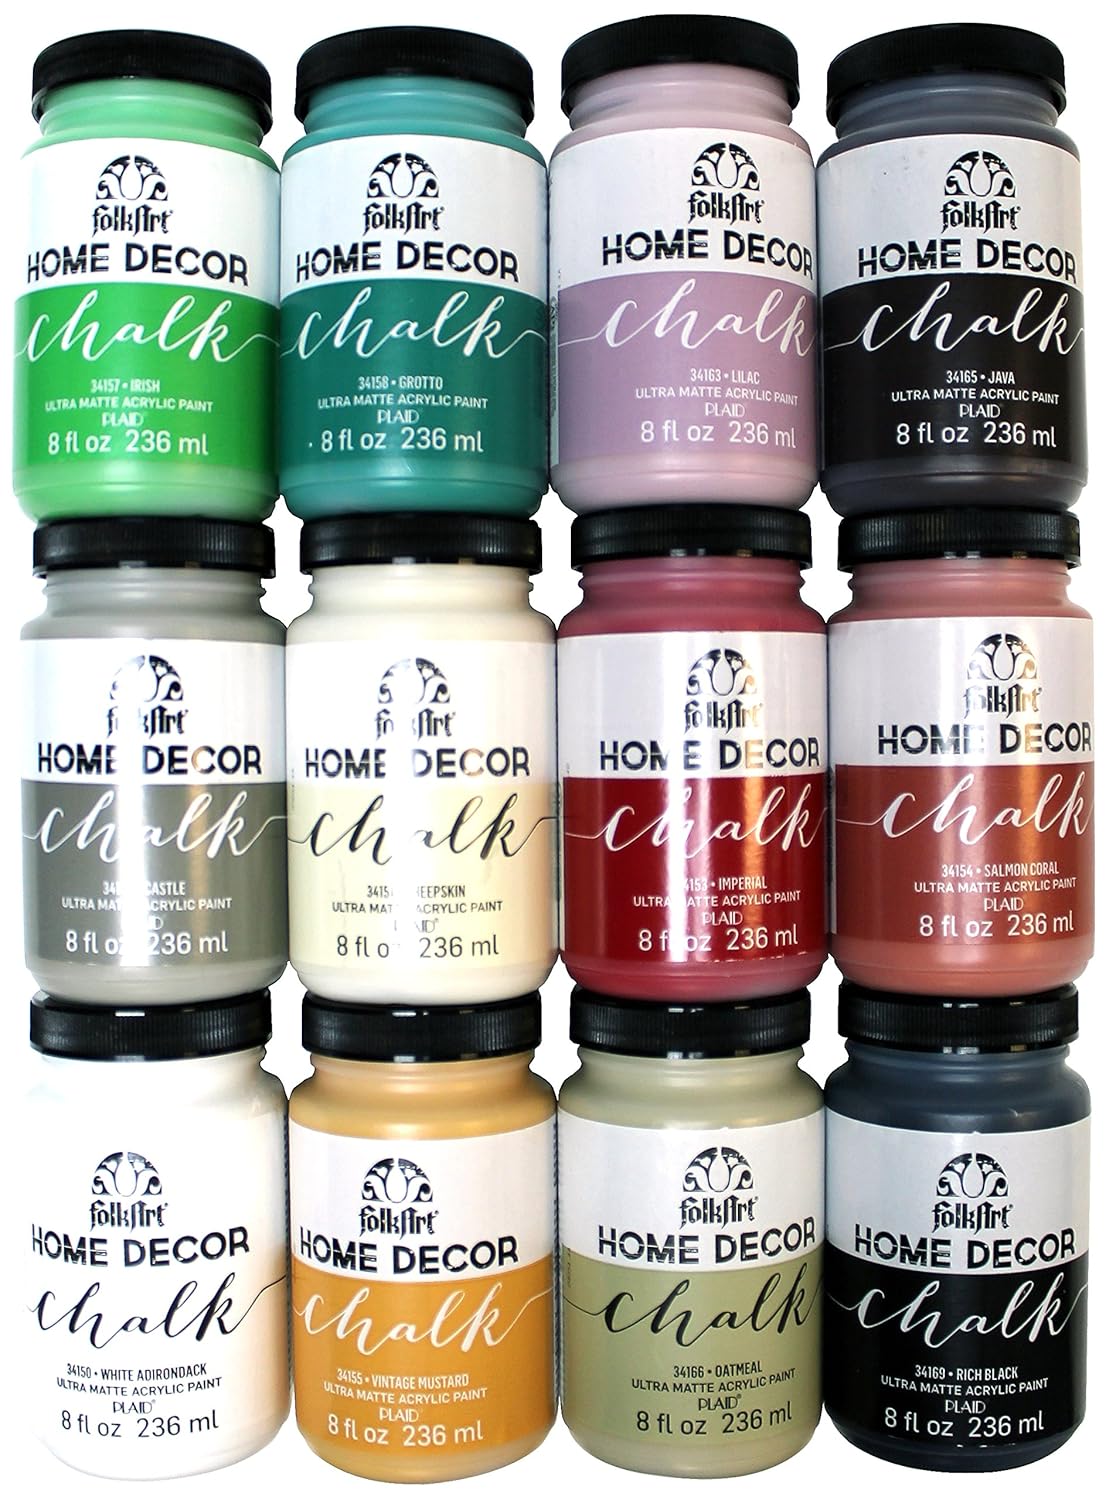
I used Folk Art Home Decor Chalk paint; purchased at A.C. Moore. They were on sale and I picked up three colors for $21. While it did take all the white I purchased, I used very little of the off white and taupe/gray color.


I poured some of both whites onto a paper plate. Using the same putty knife I dragged the paint onto random bricks. After the paint and spackle were dry I used a sanding block to knock down and edges or marks not consistent with the look of the bricks.


Using a 1:3 ratio I mixed white chalk paint with water. That is 1 part chalk paint to 3 parts water. Stir, stir, stir and then stir some more. you will need to continue to stir as you are applying as the paint tends to want to settle. Now the messy part. I used a chip brush, nothing expensive, and worked in about three foot square sections. Brushing on the paint is messy and drippy. The bricks are porous and take the paint quickly. The grout was a little more resistant but I got the hang of it. I used a rag to dab and rub to my liking. There is no right or wrong way to this.


Standing back, I like the look, I think. I will keep going to get one coat on everything. At this point I realized I should have protected the fireplace surround I had just painted so I had to stop and cover it. (I just get so excited when I get something done that I like to look at it but now was not the time.)


I liked this look but we were going for something different based on photos my friend/client had found on Pinterest. While this dried I got a coat of new paint color on the walls.

The brick was dry. I grabbed another chalk paint in a tan color mixed in the same 1:3 ratio. I brushed this on random bricks. And, that did it. That was the look we were after. I used the sanding block and sanded through some of the paint wash to see a bit of the brick color in some spots but ever so lightly. Depending on the look you're after you can sand more. the chalk paint is easy to sand through.


The colored bricks on top need a little white wash and a sanding to match the bottom ones.


I removed that paper and tape from the fireplace. This part of the project took only a few hours but I did paint the walls and got a coat of paint on the trim the same day. I'll come back the next day to give the walls and trim a second coat but the fireplace is done... Now it needs a mantel ....


Stay tuned.... 
and yes, I am still working on my own house!


Linking up to these parties:
The Chelsea Project, Cedar Hill Farmhouse, Coastal Charm, I Should Be Mopping The Floor, Skip To My Lou, Creatively Living, Plucky's Second Thought, Strangers and Pilgrims On Earth, A Stroll Thru Life, Our Home Away From Home, Ducks n'a Row, The DIY Dreamer, Savvy Southern Style, Home Stories A to Z, Mad In Crafts, The Crafty Blog Stalker, Lou Lou Girls, Celebrate & Decorate,
DIY By Design, Gratefully Vintage, Gingersnap Crafts, Mom Skills, The Vintage Nest, Joyful Homemaking, Have A Cup Of Mrs. Olson, The Pin Junkie, A Delightsome Life, My Repurposed Life, Imparting Grace, The Charm Of Home, Up To Date Interiors, Our Hopeful Home, Katherine's Corner, Craftberry Bush, French Country Cottage, the DIY Village, Life With Lorelai, The Boondocks Blog, Shabby Art Boutique, The Cottage Market, DIY Vintage Chic, Olives N Okra, Ms ToodyGoo Shoes, Pieced Pastimes, One More Time Events, Finding Silver Pennies, Nifty Thrifty Things, Reasons To Skip The Housework, DIY Showoff, Create With Joy, Re Do It Yourself, Stonybrook House