Wednesday, April 1, 2020

Scared of Water

If you've followed along on my social media accounts you may have noticed some artwork posted. I  have dabbled in art work my whole life. As a kid I loved to draw and color. At one point my mother checked into getting lessons for me but we were a military family of five and there was little money; nothing left over for such frivolities. My art teachers in public school supplied me with the only formal education I would receive. I was blessed to be exposed to a lot of different mediums and some I gravitated toward more than others.

I took home economics (do public schools still have that) in junior high school. That introduced me to the world of sewing. I learned the basics; how to thread a machine, how to follow a pattern, and how to hem and hand stitch. It has served me well over the years. I used to sew outfits for each of my girls. Later I made things for my home like pillows, table runners, and curtains. I've made tote bags, aprons, and gifts for family and friends.

I also took photography in junior high school which taught me how to develop my own film. Nobody does that anymore as the digital camera has revolutionized the industry. I also learned some things about composition and exposure. I have forgotten everything I learned about f-stops and and exposure but at one time I possessed the knowledge.

And that was where the formal education train ended other than one small stint with ceramics in my early twenties. Nothing survived from those days and I think I should probably be grateful! Anyway, all that to say that recently I took my first adult painting class! It is in a medium that has intimidated me for a long time, so much so that I just wouldn't even try it. I was afraid of water. I managed to do some things to show the kids when we were homeschooling but nothing that I would ever show to anyone. You can't control water; it goes where it wants to like an excited puppy! When painting with other mediums you can paint over a mistake but not so with water colors. You have to think backwards-highlights and breaks in surfaces.... Ugh! Also, colors get "muddy" quickly.

So yeah, this was not for me... at least I didn't think so.

Last autumn we found a church. You may have read about our experience with our church in a previous post. It has been a looooong (2+ year) search but I think we have found a place we can serve and rest. And, I have met a new friend...

                                                         that teaches art classes!!!

and she had just begun a class on watercolors. I decided to step out of my comfort zone and give it a go. I am so glad I did!

This was my first attempt!


My second lesson.


The third lesson. Christmas tree ornaments made in class.


So this was after just four classes. No, not great or even good quality and I can definitely see my mistakes and areas I need to learn to do better at but my appetite has been whetted/wetted. (Ha!) I am hooked. Here are some more recent attempts:


1st attempt at a seahorse:


 A second attempt at the seahorse during Covid quarantine:


Because of the state of our world presently we are all finding ourselves spending much more time at home. I confess that I have a tendency to look at it like I'm stuck but am trying to shift my way of thinking to one of gratitude. I get to be home right now where I am warm, have food and comfort and so do many of you. Try something unfamiliar. Try something you've been intimidated by. You don't need to run to a craft store or order from Amazon. Look around your home. Write a poem. Grab your phone or camera and walk out to your yard. Document Spring in your area.

While my new teacher friend is not presently conducting classes I have found instructional videos on line and tutorials on Pinterest so I am going to continue with the watercolors and I am going to try a few other things, too. Turn off the television and find a way to use your creative mind to make something beautiful.

Who knows what is waiting out there (and inside here, too) that we didn't know we could do!

Blessings, 


*Because of a Blogspot problem I had to update this post with the photos again. Sorry if it is not exactly as the first post.


Tuesday, March 17, 2020

Schooling From Home

It has been months since I have posted to the blog. Life hasn't been particularly hectic, no devastating illnesses, no big changes... it has just been ordinary. In light of recent events in our world I am realizing just how ungrateful I was for "ordinary". 

I am a wait-and-see type of person. I think it plays nicely with my tendency to procrastinate. But sometimes life just doesn't give you either luxury. In recent days I have heard from parents who are finding themselves thrown into a position that I miss. They have to school their children at home. I cannot tell you how many times over the years that people told me "Oh, I could never do that", and yet here we are, sheltering in place, being "forced" to learn and teach in our homes. 

School districts all over the country are scrambling to get information and plans up online but in the meantime what can you do? This was my (edited) emailed answer to a friend:

First, let me say that I envy the next few weeks for all the mamas and daddys who get to have their kiddos home. You may feel like Alice in Wonderland falling down the rabbit hole. I know it sounds scary but really, it is a time to get to know your littles in a different way and to learn alongside them. 


If you have to come up with something for a short time, pick subjects that you know they will be interested in, like sharks or computers. You can specialize this right now because it is short-term but it is a taste of what homeschooling can be. 

Once you have your subject/subjects then go hunting on the internet. Pinterest is a good source or Google "free lessons plans for ___________". Search phrases like "free lessons on sharks" or "free printables for sharks". 

As an example you can teach vocabulary words related to sharks. Learn their classification in the animal world, binomial nomenclature and different types of sharks. You can study geography and oceans; which oceans you will find sharks in at what times of the year.  Discover where they like to dine and what they eat.  Discuss the science behind why they migrate and what happens when their food source is scare/abundant. Cape Cod is an excellent example of that. 

Find a story like The Shark Lady, which is only 23 minutes long (https://www.amazon.com/Shark-Lady-Eugenie-Fearless-Scientist/dp/B076BWCY4J), to listen to together online. For longer books, listen for a specified period of time everyday, maybe after lunch then discuss, allowing them to tell the story back to you. After discussing, have them write a brief review of the book, documenting the author, title, date they listened to it. There are printables on line they can fill out. Free book report printables:  https://www.pinterest.com/pin/813040538967088748/ .

Build a lapbook or scrapbook using printables with information about what they are learning about sharks. Here are some I found on pinterest: https://www.naturalbeachliving.com/shark-information-for-kids/ or https://www.simpleeverydaymom.com/free-printable-shark-worksheets/  The scrapbook will be a reminder of the time they got to spend at home, learning beside you. 

Check web pages like the New England Aquarium. If you click on their "learn" tab for "families and teens" you can find more resources with ideas and things to do or study out. You're not limited to just the aquarium in our own backyard but you have access to the best aquariums in the world at your fingertips, in the comfort of your home.

I Googled "dissection of great white shark" and found a PBS episode: https://www.pbs.org/video/inside-natures-giants-great-white-shark/

Intersperse their math skills. As soon as a multiplication time test is done they can watch the video (as an example) or listen to an audiobook on the subject. 

If computers are of interest your child do the same thing. Maybe teach them to simple coding. Search Pinterest for free computer coding lessons like here: https://teachyourkidscode.com/free-binary-numbers-worksheet-for-the-holidays or https://www.pinterest.com/pin/566116615658686837/. Learn the history of the computers, why they were first used, who developed them. How did companies like IBM play a role. What was Prodigy? Learn vocabulary related to computers. Write small sentences in binary code. The possibilities are endless. 

When my kids were young I learned that sometimes their brains just had a hard time focusing. They have to get the wiggles out! A friend taught me, by example with her children, to send those kids outside to run around the house 10 times. Make it a race, everyone gets some fresh air, it expends energy and connects them to something other than your four walls. 


Don't worry, parents. You can do this. Who knows your children better than you? You are being given an incredible gift. Start your mornings curled up on the couch together. Pray, read some Scripture and let them know that you are not worried, God is still on his throne. Let them hear you thank God for this time as a blessing not an inconvenience. Homeschoolers who do this as a way of life and those of us who were retired from homeschooling by the fruition of our work are praying for you. 

Blessings, 

Monday, November 18, 2019

Thanksgiving Thoughts 2019

My home has been decorated since September for fall. The blues and greens that I used in preceding years gave way to more traditional rusts and oranges this year. The front porch and dining room were shared in previous weeks. The freezing temperatures have killed off my mums on the front porch. I threw them out today and will start on Christmas out there this week.


But inside it is still fall.


I have so much to the be thankful for but today I am thankful for a set of sixty (maybe more) year old dishes.

My dining table had been set with everyday, plain, white dishes but they have now been replaced with my great-grandmother's dishes. My mom had married her grandson, my step-dad, when I was seven. The first time I met her I was about ten years old. We flew to Florida that year for Thanksgiving at her house. She was originally from New York City but had retired in Florida. We lived on a military base in Washington state so this was our first meeting.  I remember being struck by the fact that her dishes had turkeys on them! Her table was full of crystal serving pieces, silver plated dishes and real silverware as opposed to the flatware and Corelle ware that graced our table back home. People "back east" entertained differently then and way different from what this poor girl was used to. Imagine, plates that were just for Thanksgiving!


Two years ago I was enjoying some free time visiting some of my favorite blogs and I saw someone's post about their Thanksgiving dishes. It immediately sparked the memories of that ten year old girl. All my loved ones that are no longer with us were happy and well in those memories. I knew those dishes had been passed onto my mother a few years before she had passed. My dad had not gotten rid of them but also had no idea where they were. It took a trip to my dad's to find the dishes, pack them up and ship them home.


They are only out for a short time. They are not dishwasher safe, I don't think. (I wouldn't want to test it.) But to me they are worth the extra care and the extra space they take in my cabinets.

The table is set and ready for celebrations, conversations, and laughter. When I walk through the room during the day memories flood my mind. I can almost smell my great-grandmother's mincemeat pie. It was the first time I had ever had it or heard of it! It mingles in my brain with the fragrance of my grandmother's perfume, my grandfather's tall frame, and the sound of my mother's voice. I am thankful for these people that loved me so well. Even though they are no longer with us the dishes remind me of them and of that time; a time when my own version of the Norman Rockwell family was carefully sown into my brain. I had no idea at the time. I took for granted the gathering of family and, knowing me, I was probably bored out of my 10 year old brain with all the "grown up talk".

So now, how amazing it is to me that the memory is so precious that it ignites a heart of thankfulness. Thankful for the love, thankful for the memories and thankful for an incomplete set of dishes that are used for a very short time every year. Perspective is everything, friends.


May your Thanksgiving celebrations be filled with moments that plant memory seeds of family and love. I also pray that you are able to appreciate moments as they happen and that you intentionally take time to look at the faces, hear the laughs, see the eyes, feel the love (no matter how imperfect it may be) and to give thanks to God for the people He has put into your life. We and they are not promised tomorrow. We have today and today is enough to be thankful for.

Psalm 100:4 - Enter his gates with thanksgiving, and his courts with praise! Give thanks to him; bless his name!

Happy Thanksgiving, friends. 

Tuesday, November 5, 2019

When Things Don't Go The Way You Had Planned- Do The Next Thing


Friends, do you have those days when you cannot see what the future has for you?
 Do you have seasons you must to walk through and they make absolutely no sense as to how they fit into God's big picture? 
Do you struggle with your plans for the future looking like they are seemingly nothing more than dust caught in tornadic winds? 
Is the fog so thick that you cannot see where to place your next step? 

Sometimes all we can do is the next thing. You may be numb as you take that next step; not able to feel your legs beneath you but step you must. 

God has called us to a particular walk, a definite road, a predestined path. 

Proverbs 16:9
The heart of a man plans his way, but the Lord establishes his steps. 

The following is an old poem that encourages me in those seasons when the cares of this life make things so murky and obscure my view to what lies beyond this day. 

Do the Next Thing

From an old English parsonage down by the sea
There came in the twilight a message for me;
Its quaint Saxon legend, deeply engraven,
Hath, as it seems to me, teaching from Heaven.
And on through the hours the quiet words ring,
Like a low inspiration: DO THE NEXT THING.

Many a questioning, many a fear,
Many a doubt, hath its quieting here.
Moment by moment let down from Heaven,
Time, opportunity, guidance, are given.
Fear not tomorrows, Child of the King,
Trust them with Jesus. DO THE NEXT THING.

Do it immediately; do it with prayer;
Do it reliantly, casting all care;
Do it with reverence, tracing His hand
Who placed it before thee with earnest command,
Stayed on Omnipotence, safe ‘neath His wing,
Leave all resultings. DO THE NEXT THING.

Looking to Jesus, ever serener,
(Working or suffering) be thy demeanor.
In His dear presence, the rest of His calm,
The light of His countenance be thy psalm.
Strong in His faithfulness, praise and sing!
Then, as He beckons thee, DO THE NEXT THING.
(source unknown)

Whatever today brings for you, whatever tomorrow has in store- fear not beloved for you are His. 

Love, Jolena

Thursday, October 31, 2019

Fall Front Porch 2019

October flew by!

I always love decorating the front of our home. I see it as the first welcome our visitors receive and I want it to look like a place you just want to come in to. This time of the year as I drive past beautiful homes, I imagine life inside those homes filled with warm cups of tea or cider, the smell of gingerbread and candles a glow.

You probably don't live close but if you did that would be how I want our home to feel for you; kinda like a big welcoming hug.


Thanksgiving is four weeks away! I have so much to do between now and then! It seems I just get things set for the new season and it is time to change it all up again. I'm already thinking about Christmas decorations. If you're a home decor blogger or follow many of them you'll understand that I am behind...again. 

Oh well... I think I will grab a cup of tea and just enjoy the blustery weather outside and the glow of candles inside. 

Party Links:
Katherine's Corner, The Pin Junkie. Grammy's Grid, Life With Lorelai, Shabby Art Boutique, Happiness Is Homemade, Our Home Away From Home, The Dedicated House

Tuesday, October 15, 2019

Fall Fireplace Mantel

Autumn in New England is a beautiful thing. The air turns cooler, the leaves turn multiple shades of amber, topaz, crimson, and gold. Nights are chilly and brisk mornings clothe themselves with a frosty mantle. All these serve to beckon one to take refuge from the cold in front of a roaring fire, warming the toes and nose while enjoying all things cozy and snuggly.


This year, thanks to my faux fireplace (tutorial here) , I get to enjoy at least the thought of that if not the actual warmth of a fire.

A wool garland,  purchased at Home Goods, was doubled over and attached to the mantel using cup hooks I screwed in underneath the mantel top.


Faux Chinese Lantern flowers were placed in a black basket and a black framed mirror were place atop the mantel along with some velvet pumpkins collected in years past. I reused a boxwood wreath from another room in the house. A strand of warm lights and a candle finish off the mantel dressing.


A favorite set of placemats sit on our dining table, holding chargers and simple white plates. Orange plaid napkins are adorned with clear and gold beaded napkin rings. Each place setting is accompanied by gold plated utensils and marmalade colored water glasses (actually, they're plastic from the dollar store).


Down the center I placed a table runner in creamsicle orange. I used my metal tray I purchased last fall. I filled it with pumpkins I had painted last year and reused the gold ones from a few years ago. A berry garland and pumpkin colored, battery-operated candles fill in the tray. Reuse what you have. Find different ways to reuse them or use them in different places than the previous year.


Sometimes you just want to do something different all together or perhaps you're just tired of the same ol',  same ol'. That is how I felt about some of my "primitive" fall decor and some of my burlap stuff so I sold them on a local site and used the money to buy a few things to freshen up my autumn displays. And sometimes something entirely new, like my fireplace, is just what the room needs.


Happy All-things-cozy, Happy Frosty-mornings-snuggly-throws, Happy Fall, Happy Autumn! Thanks for spending time here. I hope you found some inspiration or just grabbed a little "me time". 

                                                                         Jolena
Linking to these parties: 
The Dedicated House, Our Home Away From Home, The How To Home, My Uncommon Slice of Suburbia , Create With Joy, Home Stories A to Z, April J Harris, My Repurposed Life, Lou Lou Girls, My Wee Abode, Fluster Buster, Oh My Heartsie Girl, Across The Blvd, Zucchini Sisters, Follow The Yellow Brick Home, Love My Little Cottage , Ducks N'A Row, 2 Dishing Divas

Tuesday, October 1, 2019

Wood Sign Tutorial

Sometimes updating your decor can be a simple as going your the scrap wood pile. I wanted a sign to hang over a collection of pumpkins. I scoured the internet and fellow bloggers to find something I could settle on then decided to see what I could do on my own for no money, or at least only a little money.

I found a piece of scrap pine from my faux fireplace in the garage.

** I didn't do this next step first! I realized it only toward the end of the project. Don't wait, do it first.  I had not made sure that my wood was squared to begin with. Often when you buy a length of wood from the store you need to fresh cut the end to be sure that it is square before measuring out your piece. Turns out all was good-whew- but do this first!!

Using a piece of chalk and a ruler I measured out equal distances from the edges and then hand traced a semi-circle because I wanted my letters to make that shape on the bottom of the words but straight on the top.


I want my sign to read PUMPKIN PATCH. Counting letters and spaces, divide by 2 and that will give you your letter that should be in the center of your sign. I my case it was the letter N. I start with writing that letter first, in a VERY light pencil. I use pencil because I want to do this with a marker and it won't trace well over the chalk.  Continue writing letters out from the center. (You could use a stencil if you don't feel confident free-handing this step.)

Once the letters were spaced I decided I wanted to paint the wood! Yes, this is going to cover up my letters... I compromised and mixed paint and water, 50/50 and brushed it onto the wood. I could still see my pencil markings. Allow to dry.


I took a Sharpie Fine Point marker and my ruler and traced my pencil markings making sure to keep everything straight, use the top of your ruler or a t-square to keep your letters perfectly perpendicular to the top and bottom.


Next I used the Sharpie King Size to emphasize the down strokes. Following some of my limited calligraphy knowledge, I kept the pen angled at about 45 degrees to give me a chiseled edge on the top and bottom.

I did draw an arrow on the bottom, making sure to measure first to insure a level and well spaced placement. At this point I decided I wanted to frame my piece.

As a note of encouragement (and full disclosure), I did not master this the first time through but learned from my mistake and turned the wood over and worked on the other side. Worse case scenario, sand down your mistake and start again.

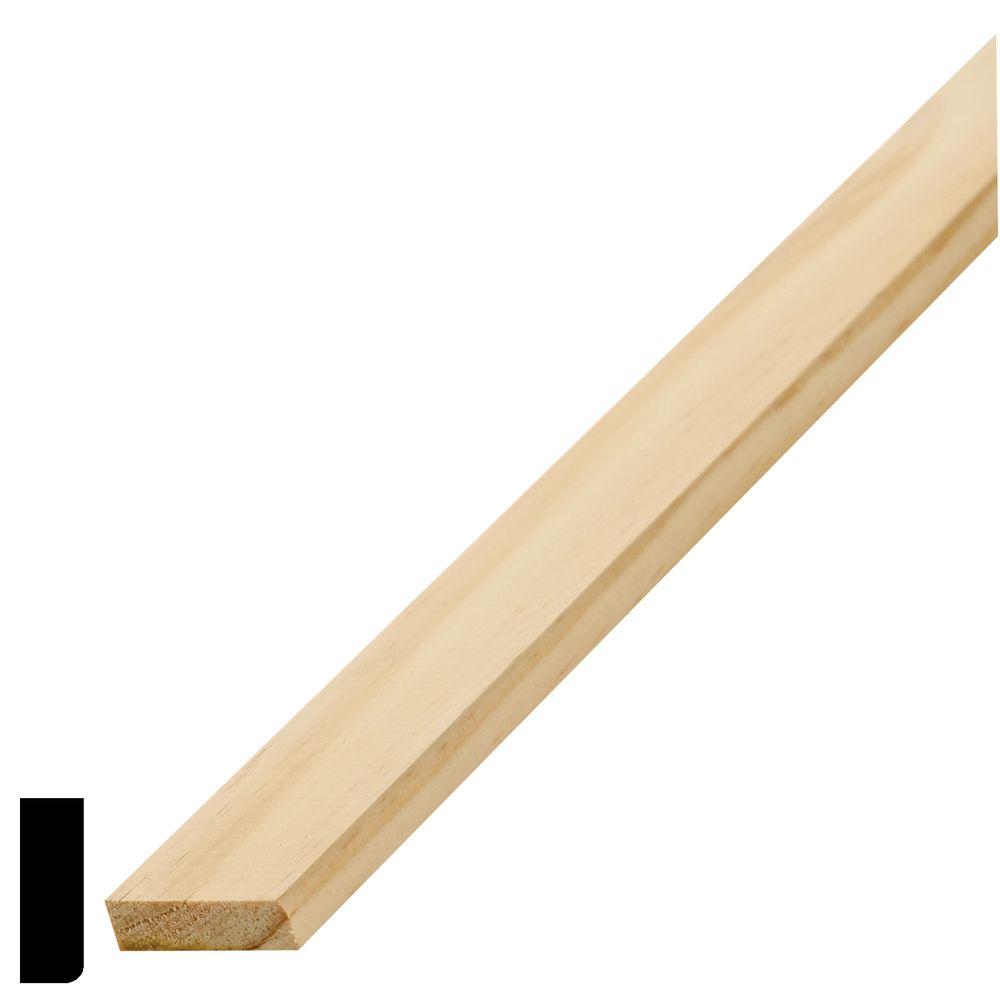
I picked up some thin trim wood, pine stop molding, for about $1 per foot. I needed about 8 feet for my piece. I'm not going to try to miter this stuff so I will cut the side pieces the exact size of the sign and the top and bottom long enough to cover the sign with the side pieces attached.

                                                           
                                                              Source

I used some stain I had on hand from other projects. The color I used was a weathered gray.

Once the pieces were dry I drilled very small holes (big enough for finish nails) in all the trim pieces, 4 in the top and bottom and 2 on either side. Using wood glue and finish nails I attached the trim pieces. I attached a hanger in the back and placed it in my pumpkin display.


Because I had much of the materials on hand this project cost me about $8. Not bad!

Linking Up!
Ducks N'A Row, Our Home Away From Home, DIY By Design, A Stroll Thru Life, My Repurposed Life, April J Harris, The How To Home, Fluster Buster, My Wee Abode, Across The Blvd, Home Stories A To Z, Grace For A Gypsy Katherine's Corner, Create With Joy, Imparting Grace, Life Beyond The Kitchen, French Ethereal , Oakhill Homestead, Our Hopeful Home, My Girlish Whims, Zucchini Sisters, Knick Of Time, Raggedy Bits, Life With Lorelai, Shabby Art Boutique, The Pin Junkie, The Cottage Market, Pieced Pastimes, Love My Little Cottage, Create With Joy, Lou Lou Girls, The Answer Is Choco, A Glimpse Inside Blog, Mad In Crafts, Finding Silver Pennies, Blue Sky At Home, The Dedicated House, Grammy's Grid, Follow The Yellow Brick Home, 2 Dishing Divas